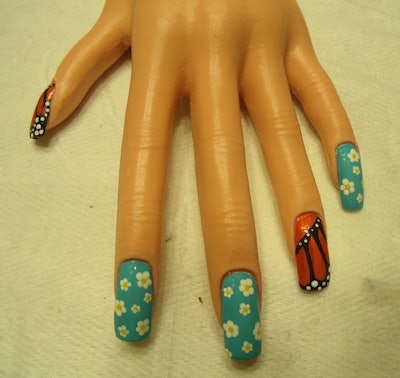
Follow Amie Pollard, nail school student and recipient of the Beauty Changes Lives|CND|Tippi Hedren Scholarship, through her days of school!
August 27, 2014
Week 7 was a bit of a strange week. On Tuesday the entire school had Open House (I was unable to take any pictures). The school does this every so often to allow the public to come in and receive free mini services to show them the types of services that we offer, as well as get prospective students to come in and check out the school. Some of the mini services they offered were chair massages, mini up-dos, and “mini manis” (polish changes). They also did demos for people to watch and offered light refreshments. Not only did this help get the word out about our school, but it was a great opportunity for us as nail techs to practice our polishing (for 3 hours).
My teacher was out that week with a family situation, so we did not do a new chapter. Instead we were allowed to spend Wednesday working on our books and study guides by ourselves just in case we had to double up on chapters the next week (which we did not, thank goodness!) And on Thursday we had clinic.
Because this week was a weird week and there is not much to write about, I decided to do a simple nail tutorial for you. A lot of people liked the butterfly wing nail that I did in class so I chose to do that, as well as a simple blue/ daisy nail to go with it, which is optional. I will list the products I used at the end.
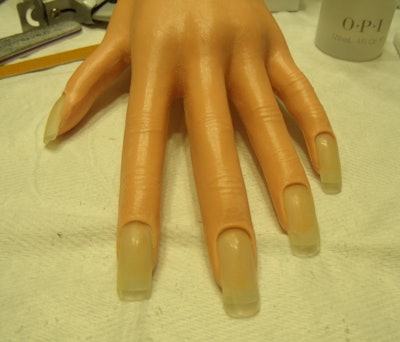
First, I started out by doing a full set of sculpted acrylics on my creepy practice hand. We just recently learned this in our class, but that will be coming in a later week.
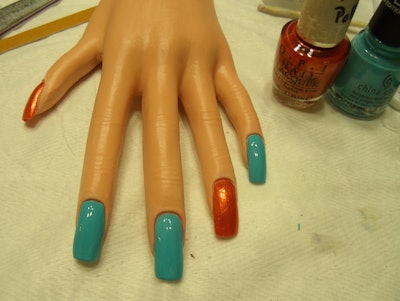
I painted all of the nails with a base coat, and then I painted the ring fingernail and the thumbnail with a sparkly orange color (color is totally up to you). I painted the light blue nails with white first to make sure the brightness of the blue was able to stand out.
To start the butterfly wing, draw a black line diagonally across the nail. The direction doesn’t matter, but it will determine which way your wing is going to go.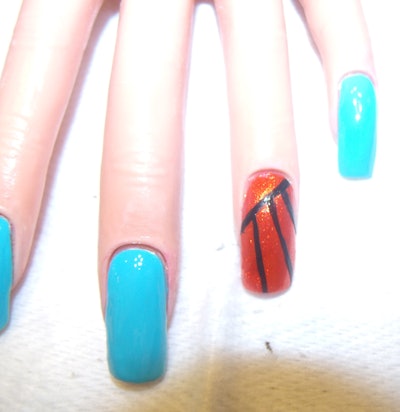
Draw 3-5 lines diagonally across the nail starting below the first line, going in the opposite direction.
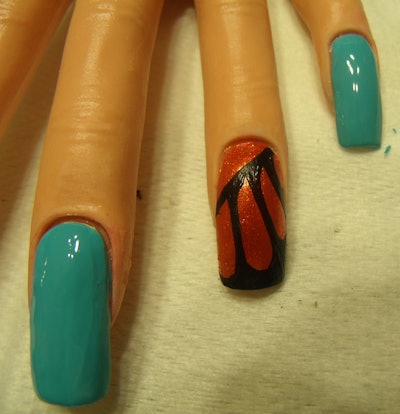
Go back around those lines to define the detailed area of the wing, as shown in the picture.
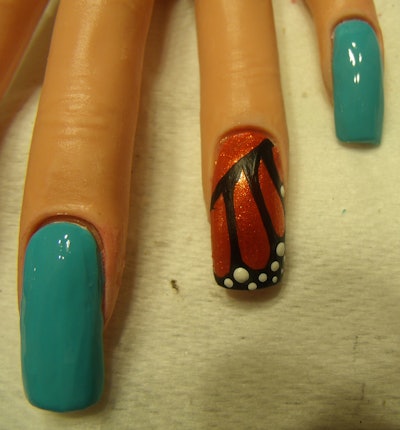
Use a dotting tool and white acrylic paint to apply a variety of sizes of white dots to the black area at the edge of the nail. I like to put the large dots closer to the orange, and then make them small as they get closer to the edge.
Then, if you like, add small white dots to the first black line. This is optional, I just like the way it looks. Follow all of these steps on the thumb nail as well.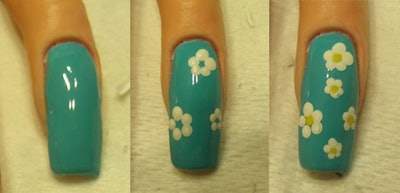
While that dries, move on to your blue nails. Use your dotting tool and place 5 dots in a circle to create the outside of the daisy*
Using yellow acrylic paint, place a yellow dot in the center of each daisy.
*You do not have to do the daisy design if you don’t like it. I sometimes choose to paint the other nails plain black, or whatever color I choose for the butterfly wing.
Allow all of the acrylic paint to dry thoroughly before you apply a top coat. It will smudge down the nail if you don’t. Voilà!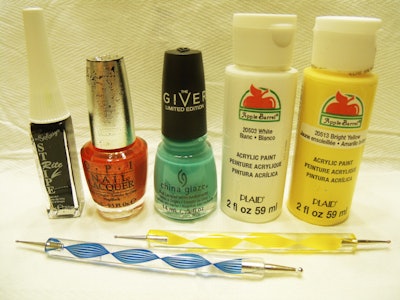
The products I used were:
OPI Designer Series: Luxurious
China Glaze Giver collection: Capacity to See Beyond
Its So Easy Striperite striper brush in black
PLAID acrylic paint in white and bright yellow
OPI Rapidry top coat (not shown)
See you next week! -Amie
See all The Nail School Diaries
[Images: Amie Pollard]


