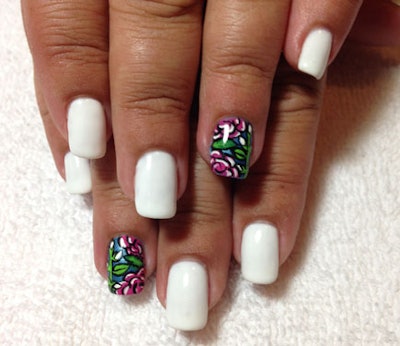
If your client can’t commit to a permanent ink design, bring the tattooed look to her nails! Here’s a design idea from Yvette Cundiff-Granzeau of Waxing Moon Nail Art. »
Supplies needed:
Nail art paints- black, white, fuchsia, light green and dark green
OPI Dining Al Frisco, or any light blue polish.
Small nail art brush, and an outlining nail art brush.
Step 1: Paint all the nails with OPI Gel Color Alpine Snow, then remove the
residue from the ring finger nails with NAS 99.
Step 2: Paint OPI Dining Al Frisco on top of the gel polish as a base color.
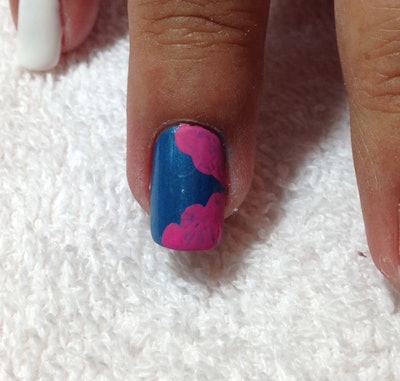
Step 3: Paint scalloped edge flower shapes in the upper and lower corners of
the nail using fuchsia nail paint and the larger brush.
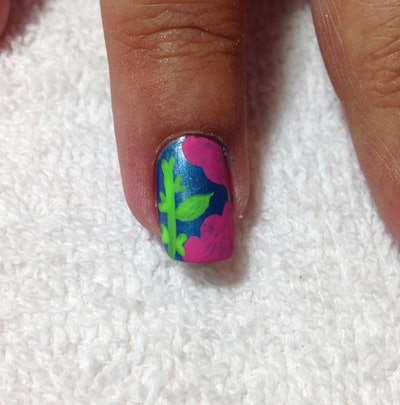
Step 4: Paint a straight line with the outlining brush and light green paint, then add V-shapes along each side, and a leaf.
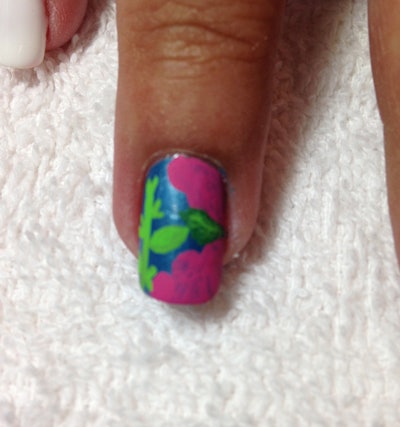
Step 5: Add a leaf between the flowers with the dark green nail paint.
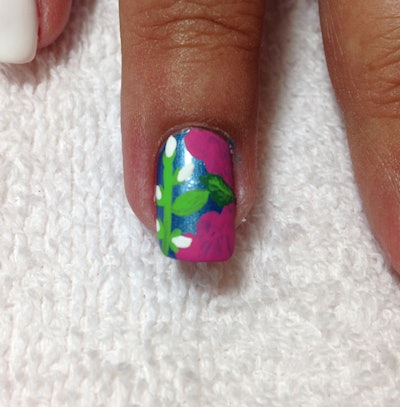
Step 6: Add veins to the dark green leaf with the light green paint.
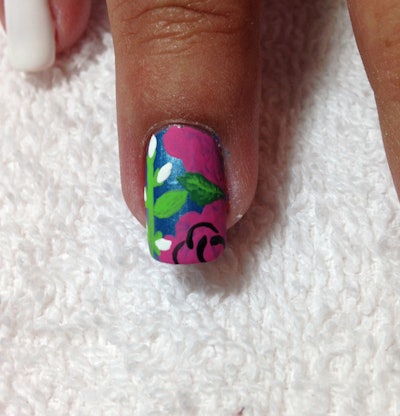
Step 7: Use the white nail paint to add flowers inside the V-shapes, using the tip of the outlining brush.
Step 8: Use the black nail paint to add arc shapes inside the fuchsia flowers, to create the petals, then continue outlining everything else, adding a stripe in the middle of the light green leaf.
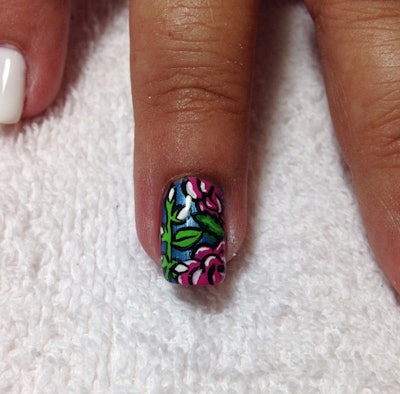
Step 9: Add highlights under the black lines on each petal of the flower with the white nail paint.
Step 10: Top coat with OPI Gel Polish topcoat, cure for 30 seconds, wipe off residue, and you have tattoo-inspired nail art!
Check out Yvette at Waxing Moon Nail Art.
[Images: Yvette Cundiff-Granzeau]


