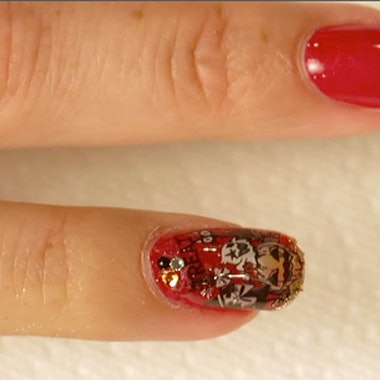
Follow these steps to create a Halloween nail look from Sha-Nail. Then watch the video to see how it’s done!
1. Prep the nail. Apply base gel, cure, and two coats of gel polish. Cure.
2. Begin applying the decals. Start with a larger design and continue adding around it.
3. When you overlap designs and let them run off the edge of the nail, it adds to the three-dimensional effect.
4. Apply a small amount of top gel to the nail and add loose glitter to those areas with a fine-tipped brush.
5. Sha-Nail Art Director Mami Griffin recommends adding top gel, curing, and then finishing with another coat of high-shine top gel. The two layers makes for a thicker top coat but also provides a magnifying effect. Before curing the final layer, add a couple of rhinestones.
6. If necessary, remove the tacky inhibition layer, and you have a set a spooky Halloween nails!


