Five bling experts create luxe nail looks using a flurry of crystals, gems and jewels.
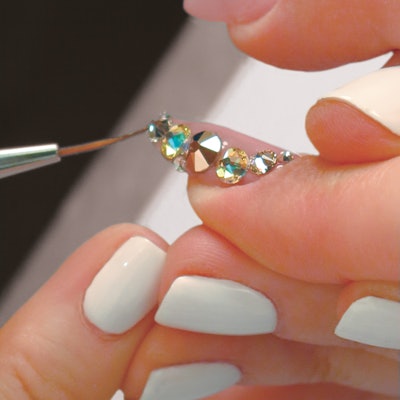
’Tis the season for crystals, jewels and gems. Upselling nail services with embellishments can easily boost profits, but it’s important to keep some prerequisites in mind: Expert technique, quality product, top-notch time management skills and a thorough understanding of your client’s lifestyle are all critical to success. For example, to ensure stones stay in place until the next appointment, you have to know how different adhesives work and then choose the right one for your embellishment type and size (think: resin, gem gel, and good-old hard gel or acrylic).
It’s also a good idea to manage expectations—both your clients and your own. With so many eye-catching embellishments to choose from, it can be tempting to go overboard when making purchases. Instead, opt for crystal packs with a mix of sizes and colors for an economical buy. “Variety packs will allow for creative crystal placement without breaking the bank or overstocking a single gem type,” says United Kingdom-based nail artist Emma Canning. As for your clients, make sure that they’re aware of the extensive time commitment required to meet their blingy expectations.
RELATED: Celebrity Manicurist Elle Creates Nail Designs Featuring Diamonds and Gems
Now that all of the bases are covered, it’s time to start creating! Take inspiration from these five nail artists who created looks that can be adapted to any client for any occasion.
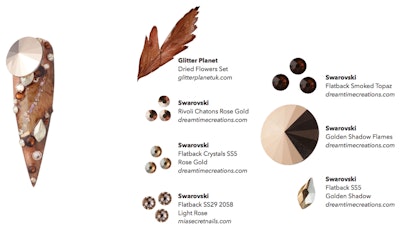
Autumn Accents
Canning captured the essence of autumn with a rose gold rivoli-embellished nail look evoking color- changing leaves. “I wanted to frame the encapsulated leaf,” she says. “The crystals near the top and bottom of the nail represent the motion of leaves twirling and floating to the ground.”
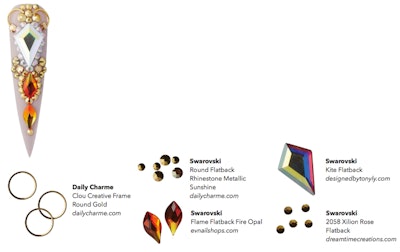
Golden Moment
Earthy fall tones inspired District Heights, Maryland-based nail artist Honey Phan to create this golden topaz tip. Before Phan even touches her embellishments, she always ensures that the nail surface is clean and free of dust and debris. Phan reveals that her secret to gem placement is drawing her design on paper before she begins. “Choose the appropriate gem sizes and colors based on the client, season and color palette,” says Phan. “You’ll know exactly the placement and stone types you need after first sketching your design.”
VIDEO: NAILPRO’s Creating the November 2019 Cover with Gelish
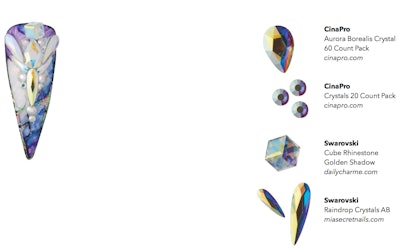
Winter’s Welcome
Nail artist Jeannette Vazquez iced- out her nail look, reminiscent of a wintery night, complete with a marble base, iridescent flakes, foils and frost-worthy bling. To create a standout design, Vazquez painted the entire nail with white gel polish and then marbled navy, blue and purple gel polish diluted with acetone. “I added chrome flakes, outlined the nail with black art gel and added oil slick foil to the outline,” she says. “Then, I sealed my design with matte gel top coat and adhered Swarovski crystals in various shapes and sizes with nail glue.” She reinforced the crystals with hard gel, sealing the edges of each crystal for a secure hold. “Use a thin nail art brush to work with the hard gel to control the amount of product you pick up,” she advises.
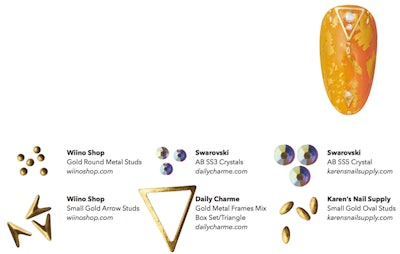
Falling Leaves
Wind chimes and transitioning autumn leaves inspired nail artist Diana Nguyen to create an almond-shape vertical ombré nail design, perfect for natural nail clients who want to add a little bling to a minimalist look. Nguyen applied a layer of gold holographic transfer foil gel over a mustard yellow-meets-terracotta-orange vertical ombré. The Black File Nails artist then adhered embellishments using gem gel to allow room to play with placement. Finally, she applied clear structure gel over the entire nail to properly secure and encapsulate the design for a flat, smooth surface.
Bedazzled Bouquet
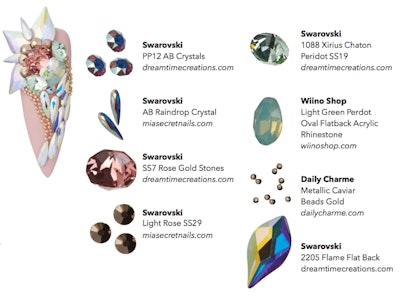
Traditional Chinese hairpins inspired nail artist Nina Blanchard to create this jeweled bouquet. “I find their intricate floral designs extremely feminine and elegant,” says Blanchard. She opted for two coats of nude gel polish to provide a clean canvas. She then applied Ugly Duckling Nails Schtick It to the left corner of the nail base and adhered three flame-shaped Swarovski crystals in a petal pattern. “To recreate a gem- heavy design, I like to start with the largest stones first,” explains Blanchard. After the centerpiece stones are properly placed and cured, she adds gem gel to the areas where the smaller embellishments will go.
–by Angelina Lewis
[Images: Courtesy of Armando Sanchez]


