
It’s finally winter time, and our clients are coming to us with a lot of inspo, ideas and pictures. For sure, there is one that pops out—chrome nails! Either in full metallic nails, French tips or designs, the chrome nail is getting more popular every day on social media, challenging us to replicate them. For lots of nail techs, these "magic" powders are a nightmare! Patches, free glitters, uncovered areas, chipped tips and more are making us sweat any time the client mention them! However, this article provides a few simple steps that will help you to get a perfect metallic effect.
Log in to view the full article
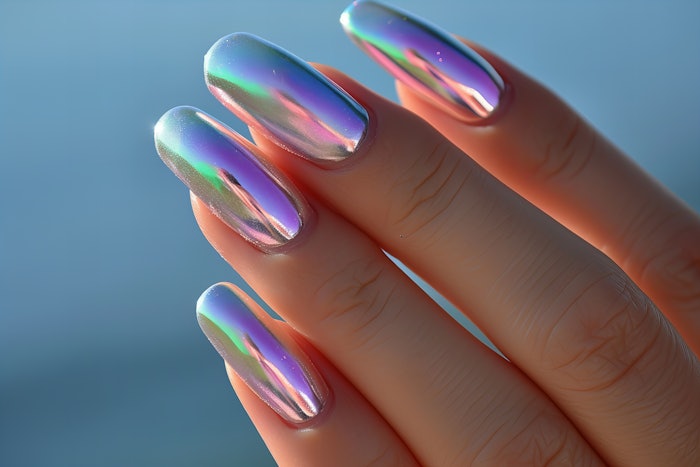
Alice Nali (@alynails.italianacademy) shares simple steps that will help you to get a perfect metallic effect for your chrome nails.
It’s finally winter time, and our clients are coming to us with a lot of inspo, ideas and pictures. For sure, there is one that pops out—chrome nails! Either in full metallic nails, French tips or designs, the chrome nail is getting more popular every day on social media, challenging us to replicate them. For lots of nail techs, these "magic" powders are a nightmare! Patches, free glitters, uncovered areas, chipped tips and more are making us sweat any time the client mention them! However, this article provides a few simple steps that will help you to get a perfect metallic effect.
FULL CHROME NAILS
Step 1. Apply a coat of gel polish that matches the chrome powder as much as possible. For example, apply a red polish layer under a red chrome powder to emphasize the effect. In the case of iridescent, multicolor or holographic powders, opt for a white or black background, depending on the brightness of chrome you want. Cure the coat completely.
Step 2. Apply a layer of shining no-wipe top coat. This is important, as the sticky layer would completely ruin the effect. Pay attention all the sides are covered. Cure for 30 seconds, then wipe the powder gently over the surface using a clean eyeshadow applicator. Make this process one nail at the time.
Step 3. After all the nails are covered with the powder, cure them all together for another minute.
Step 4. With a buffer, carefully file the free edge and sides of the nails to remove the chrome from the tip and brush the excess with a fluffy "barber" brush.
Step 5. Apply a little acid free primer over the nail, and cure for 15 seconds. This will leave a little sticky layer that will help attach the sliding surface of the chrome to the top coat product.
Step 6. Apply your favorite top coat, and make sure to seal all the tips of free edge.
Step 7. Use cleanser and wipes to remove any trace of powder from skin and cuticles.
CHROME TIPS AND DESIGNS
During my salon experience, I’ve been using two different techniques to make chrome designs and French tips.
Technique 1
The first gives a more solid and sharp effect, with stronger colors. It’s longer to make and requires a bit of precision.
Step 1. Draw the design with a gel color similar to the powders one on a buffed or matte surface (not sticky).
Step 2. After curing, use a liner brush to go over the design with a no-wipe top coat. Cure for 30 seconds.
Step 3. Apply the powder using the eyeshadow applicator. Completely cure the powder (allow another 60 seconds).
Step 4. Remove the excess using a fluffy brush. Use a cotton-swab soaked on cleanser for hardest areas.
Step 5. Apply your favourite top coat on the whole nail, and cure.
Technique 2
The second makes an effect more see-through and transparent. It requires less time but good lighting!
Step 1. Apply the no-wipe top coat on the full nail, and cure for 30 seconds.
Step 2. Rub the chrome powder with the eyeshadow applicator only in the area you want to position your French or design, and complete the polymerization for another 60 seconds.
Step 3. Using the no-wipe top coat again, create your drawing on top of the powder using a liner brush. Direction your desk light in different angles to check you made the correct design. Cure for 2 minutes.
Step 4. Clean the excess of powder with cleanser and pads. The top coat will keep the powder embedded and show your lines!
TOP TIPS FOR CHROME
- Dark backgrounds and powders are more difficult to use. When you can, choose light chromes or glaze powders on dark colors! It will make your life easier!
- Write down the steps at the beginning. Nobody will judge you for being a perfectionist!
- Even if looks easier, don’t rub the powder with the finger. Use the eyeshadow applicator. It is more professional, less messy and allows for perfect adhesion.
- Before to start the process, ensure you have everything opened. When you start, you need to apply the products quickly and with certain times. Be ready!
- The top coat has to be perfectly applied, without fluffs or dust. Chrome shows any little defect!
- Be aware that some cheap no-wipe top coats may not be 100% sticky free. Using professional products will give you better results!
- A thicker final top coat can help to long lasting of chrome. You may prefer a sticky top coat as final layer.
- The effectiveness of the chrome lasting is only half dependent on correct application — the other half being from the client’s care. It’s important to clarify that metallic powders are easier to damage and more delicate. The client should minimize typing, scratching, picking and shorting the nail while using nail tips.
COMMON PROBLEMS AND SOLUTIONS
The following are some common problems with chrome, along with possible solutions.
PRACTICE MAKES PERFECT
Don’t underestimated practicing. The more you make this effect, the easier and quicker it becomes. Also, you may need to try the best combination of colors and powders and the most suitable top coats. Make some display tips to gain confidence and, at the same time, show your clients new trends!
About the Author:
Alice Nali is a nail technician as well as the owner and an educator at AlyNails Italian Academy in London. Visit alynailsitalianacademy.com or @alynails.italianacademy for more information.