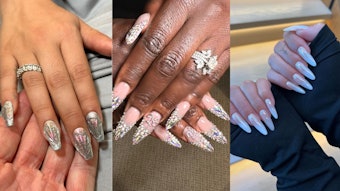
Healing stones provide clarity and inspiration for captivating nail art. To help you execute the looks easier, we tapped Santa Monica, Calif.-based nail tech Katie Masters (@nailthoughts) to share her best advice. “The trick to achieving any sort of marble or crystal design is to not overthink it. Crystals and gems are never perfect; therefore, you don’t have to be either,” she says.

1. Apply two coats of white gel polish to the nail. Then, apply a small amount of purple-gray gel to the opposite corners of the nail. Do not cure.
2. Use a detail brush to paint small dark gray lines at the corners. Flash cure.
3. Apply dark purple gel polish at the center of the nail—the wavier the lines, the better. Do not cure.
4. Apply Mylar pieces and glitter to the purple gel at the center of the nail to create a gemstone effect. Finish with gel top coat.

1. Apply sheer blue gel polish to the entire nail. Do not cure. Apply bright opaque blue gel to the nail and drag the brush through it in a round, squiggly motion—the more uneven, the better.
2. Use a detail brush to paint lines with white gel that follow the shape of the brighter blue. Repeat this step using light blue gel to add more dimension and color depth. Now cure.
3. Paint a border around the entire design using blue-gray gel. While the gel is wet, use a brush to blur the edges. Finish with gel top coat.

1. Paint a crystal shape with sheer purple gel. Don’t worry if the color is even; it will give the design more dimension.
2. Use a detail brush to outline the entire crystal
and paint lines within the shape with dark purple gel.
3. Apply iridescent purple glitter on top of the crystal. Then, outline the edge of the nail with metallic gold gel. Finish with gel top coat.
*Cure after every gel application unless otherwise noted.
What are your thoughts on crystal-inspired nails? Let us know in the comments below!


