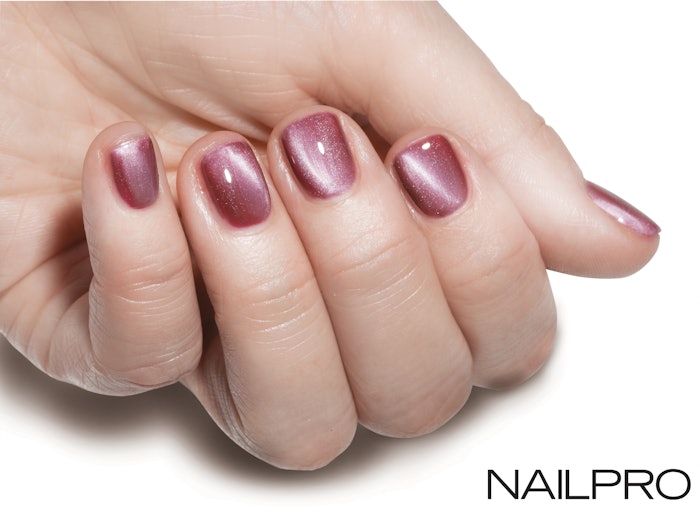
Magnetic polish is making a comeback with cat eye nails.
Seen on Instagram feeds and YouTube tutorials, the look is achieved with special cat eye polish and a small handheld magnet. So, how does it work?
According to Michelle Wong, Ph.D., beauty science blogger at Lab Muffin, the polish contains iron powder fragments that are attracted to magnets. “The iron particles are quite dense, so they usually sink to the base layer of the polish as it’s applied. When you place the magnet over the nail, the iron particles rise toward the surface and stay there due to the thickness of the polish as it dries,” says Wong.
The result? The particles can be seen through the nail polish, which creates the mesmerizing cat eye effect.
Here, nail artist Fariha Ali Nizam (@nailjob) shares her step-by-step techniques for creating the au courant look.
How-To:
Cat Eye Polish
- Prep the nail and apply a gel base coat. Cure.
- Apply one coat of cat eye polish, being sure to cap the free edge.
- Immediately after applying the polish, place the magnet as close as possible to the nail without touching the surface. Then, hold it steady for 5 to 10 seconds. Cure. Tip: If the magnet moves while being held over the polish, the design may look spotty. But don’t fret—it’s easy to fix. Apply a second thin coat of polish. It will “erase” the magnetic effect, and you can start fresh.
- Apply a second coat of polish, and repeat Step 3. To finish, apply top coat and cure.
Cat Eye Gem  Cat Eye nail look with a nail gem.[Images: photography by Armando Sanchez, nails by Fariha Ali Nizam]
- Prep the nail, and apply a gel base coat. Cure. Next, apply two coats of black gel polish, curing after each.
- Wipe off the tacky layer. To “frame” the gem, apply a nail sticker to the center of the nail.
- To create the gem, use a thin detail brush to apply clear builder gel. Start at the center and apply it in a circular motion. When the shape is slightly rounded, cure. Repeat this step until the gem is raised above the nail surface.
- Use a thin detail brush to apply one coat of cat eye nail polish to the gem only.
- Immediately after applying the polish, place the magnet as close as possible to the gem without touching the surface. Then, hold it steady for 5 to 10 seconds. Cure.
- Apply a second coat of cat eye polish to the gem only and repeat Step 5. To finish, apply top coat to the entire nail and cure.
To watch the cat eye nails step-by-step in action, watch the video below:
This article was first published in the April 2017 issue of Nailpro.


