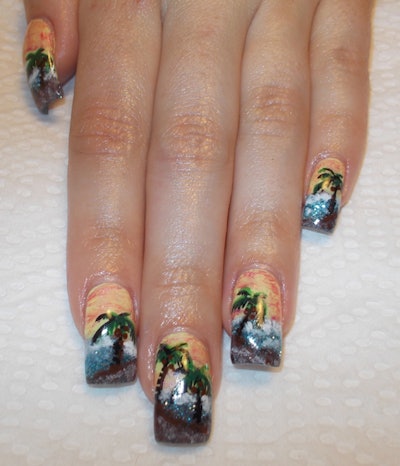
No matter the weather, you can always have a tropical getaway with this nail design. Try out this tutorial by nail artist Deanne Power by clicking through.
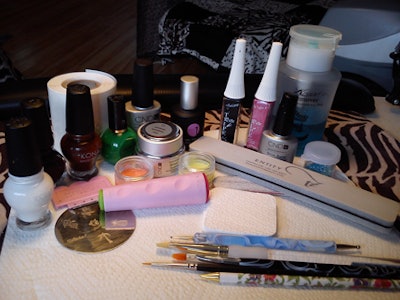
Supplies/Tools Needed:
- CND Brisa Bond Aid
- Sculpting gel
- CND Scrub Fresh
- Forms, brushes
- 180-grit file, buffer
- Dotting tool
- Dry glitter
- Stamping polish
- Plate
- Scraper
- Stamper
- Nail art polish and/or paint of choice
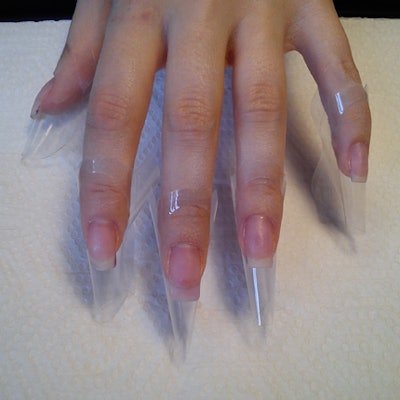
Step 1: Prep the natural nails, apply forms for extended enhancements if necessary (optional) and cure.
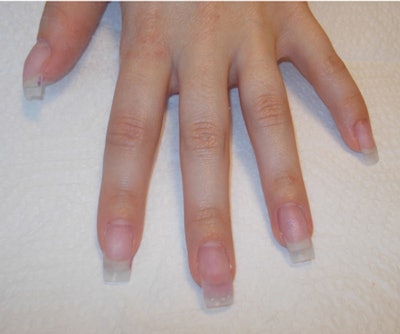
Step 2: Shape and buff the extended nails.
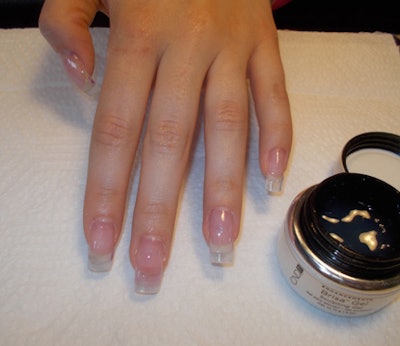
Step 3: Begin the building layer of the nails and fully cure.
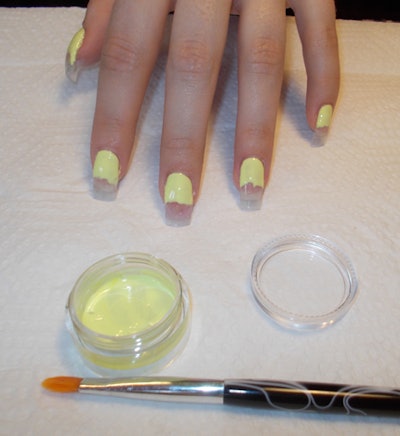
Step 4: Apply the first background color gel and flash cure (I customized my yellow gel with white for a softer tone). This resembles part of the sky.
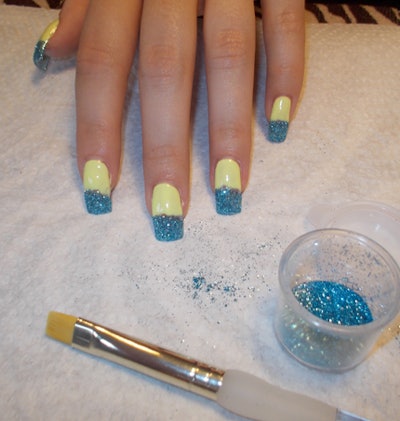
Step 5: Dip the tip of each clear nail in dry glitter and press in place so that it adheres to the sticky layer beneath. Fully cure. This resembles the part of the water.
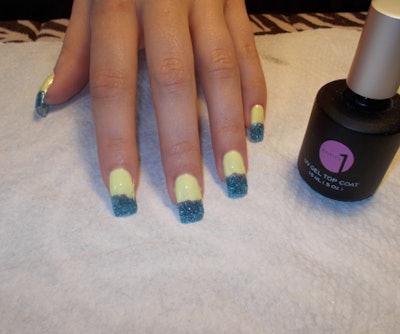
Step 6: Apply gel top coat to the glitter portion of the nail first and flash cure (this is to ensure a clean background, keeps glitter away from yellow). Then apply the same to the lower half of the nails and fully cure. Repeat on all nails with another gel top coat and fully cure. I prefer sealing dry glitter with two layers of a thin top coat, as opposed to a building gel, simply because the consistency and texture is thin enough not to shift the glitter out of place when applied.
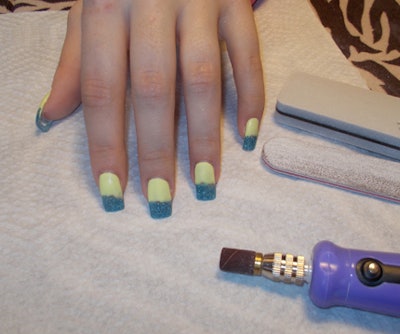
Step 7: Wipe with cleanser, shape and buff.
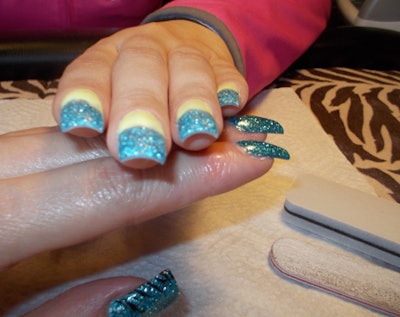
Step 8: Re-shape C-curve beneath with drill.
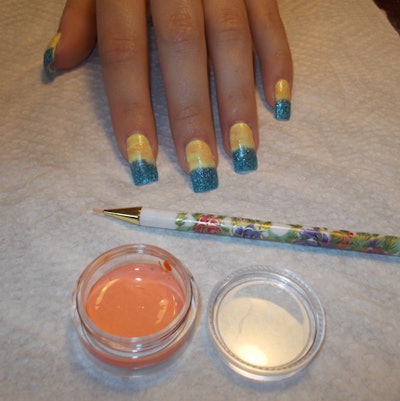
Step 9: With a small nail art brush of choice, freehand with orange gel, patterns on each nail and fully cure, then wipe with cleanser (customized my orange gel with peach and white, for a softer tone; you can also use nail art polish or paint).
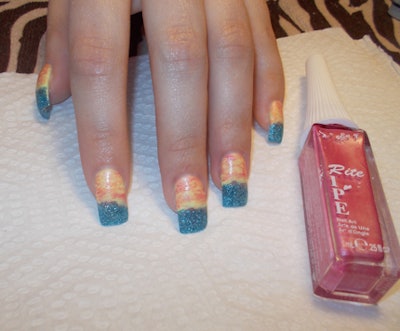
Step 10: Repeat the same freehand motions with a pink polish or paint of choice, blending with the orange, for a realistic warm, sunset sky. Then allow a minute to fully dry.
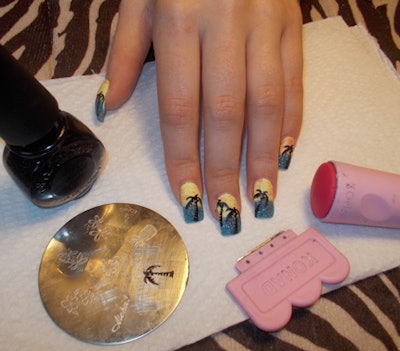
Step 11: Apply palm tree stamp of choice, with black Konad stamping polish. This resembles a silhouette of the image. Arrange palm trees to create the beginning of a tropical scene.
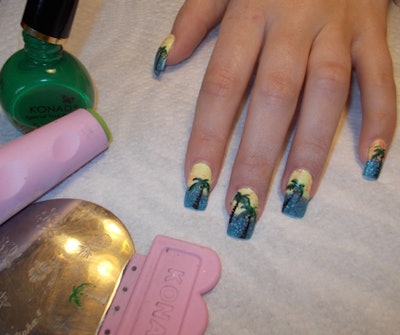
Step 12: Reuse the same image, but only the top portion in green Konad stamping polish. Overlap each palm tree to create a fuller, 3-D appearance for the greenery. Tis makes the silhouette more realistic.
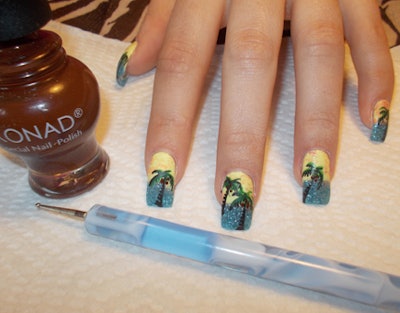
Step 13: Use a dotting tool to add brown coconuts to each palm tree. Konad works great for free-hand nail art, as it dries almost immediately.
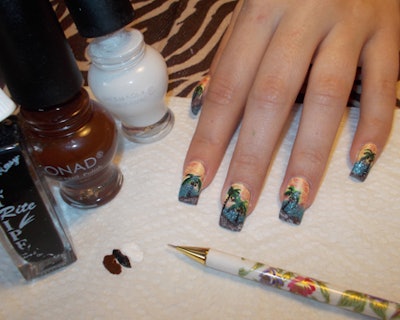
Step 14: Using a small nail art brush, mix black, brown, and white art polish together, to create the sand/beach, beneath each palm tree. Perfect details if need be once dry. Highlight some areas with white.
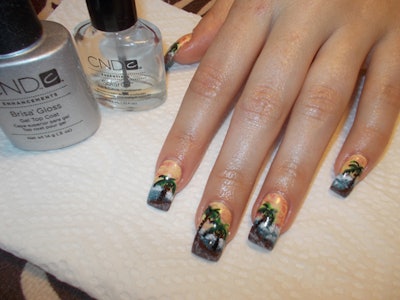
Step 15: With Konad white polish, freehand waves around the sand/beach and palm trees, as well as a horizon break between the water and sky. Again, perfect detail once dry. Finish with gel top coat and fully cure.
[Courtesy of Deanne Power]


