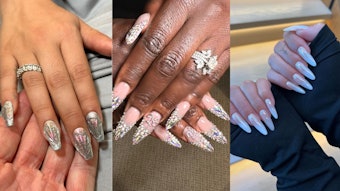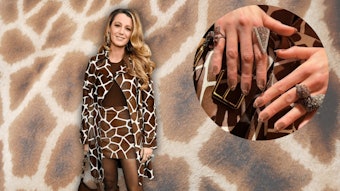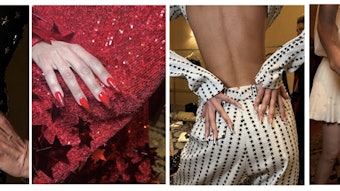
Festival season inspires creativity, freedom and self-expression through music and art, making it the perfect opportunity to show off your nail art skills. Whether your clients are headed to Coachella or Stagecoach, we’ve got you covered with two nail designs by Van Nuys, California-based nail artist Adriana Gutierrez. “Jeweled face and body accessories worn at previous festivals inspired the Coachella design, and intricate stitch patterns on cowboy boots led the way for the Stagecoach look,” says Gutierrez. Here, she shows how to recreate the looks.

Coachella Vibes
1. Apply gel base coat, and cure. Then, apply one coat of bright blue gel polish, and cure.
2. Use a dry brush or eye shadow applicator to burnish fine blue glitter into the tacky layer of the gel color. Brush off the excess glitter. Apply no-wipe gel top coat, and cure.
RELATED: Create Embroidered Nail Designs with Akzéntz Gel Play Lace
3. Apply stone resin to the base of the nail and adhere a large flatback teardrop crystal. Then, add more resin and apply two flatback raindrop crystals pointing down the nail. Add small flatback round stones around the larger stones to finish the design.
4. Use a striping brush to outline the crystals and perimeter of the nail with turquoise gel. Cure. Finish by applying high-gloss gel top coat on the nail only, avoiding the gems. Cure.
Nail professionals share their tips for creating standout designs that will survive the festival frenzy.
Use gel paint for intricate designs. Gel paints are perfect for creating fine lines, marble effects and custom color blends. “The medium viscosity allows me to create designs that won’t run or smudge,” says Christrio educator Mya Vo. Another benefit to using gel paint for nail art? It doesn’t “dry” until cured. “If you make a mistake, simply remove it with the swipe of a brush,” says Christrio educator Jacie Currington. To avoid smudging, flash cure between each step of the design, advises Vo. Gelish master technician Vu Nguyen recommends controlling the amount of gel paint that your brush picks up for a clean, sharp design.
Keep crystals intact. Swarovski crystals can add a wow-factor to any nail design, but proper application is essential to ensuring longevity. Since crystals are rigid and nails are flexible, the key is to use an adherent that can bend while still securing stones without cracking or breaking, says Nail Hub CEO and Swarovski Beauty Academy educator Elizabeth Morris. “Choose a flexible yet sticky low-viscosity adherent,” she says. “Glue tends to be brittle and etch the surface of the crystal, diminishing the shine. But if you use a soak-off gel, you can soak off your crystals and reuse them—acetone won’t damage them.” After adhering the crystals, use a detail brush to apply a flexible gel top coat around the girdle of each crystal (the tiny “wall” around its base), ensuring that the gel is applied completely around the edge of each crystal. Flash cure during the application if you’re using a higher-viscosity top coat. Never apply resin or gel on top of the crystals, as it diminishes their shine and dulls the facets.
RELATED: Roy Lichtenstein and Gary Grayson Inspires Animated Tips
Ensure longevity with gel polish. The keys to achieving long-lasting results are proper prep and using products from the same manufacturer, says OPI education manager Sigourney Nuñez. The most common service breakdown from gel polish occurs because of improper capping, which causes the gel to lift from the free edge. To remedy this, “After shaping, swipe a buffer underneath the free edge to remove any fraying,” she says. Another tip: Don’t forget that oils resurface, adds Nuñez. “If you’re using a pH balancer or dehydrator, work on one hand at a time to ensure the product does its job properly,” she says.
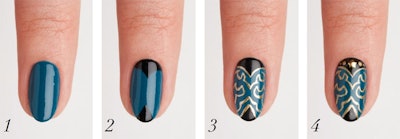
Stagecoach Style
1. Apply gel base coat, and cure. Then, apply two thin coats of teal gel polish, and cure.
2. Use a detail brush to paint a triangle at the free edge with black gel polish. Then, paint a rounded triangle at the base of the nail; cure.
3. Use a detail brush to outline the triangles with metallic gold gel paint. Then, paint a gold half fleur-de-lis on each side of the nail. Cure.
4. Use gel resin to adhere a small gold star at the center of the black triangle at the base of the nail. Then, use a dotting tool to add gold accents on both sides of the star. Cure. Finish with gel top coat and cure.
–by Angelina Lewis
This story first appeared in the April issue of Nailpro magazine. To receive the magazine, click here to subscribe.
[Images: Courtesy of Armando Sanchez; Brooks Ayola; Getty Images]

