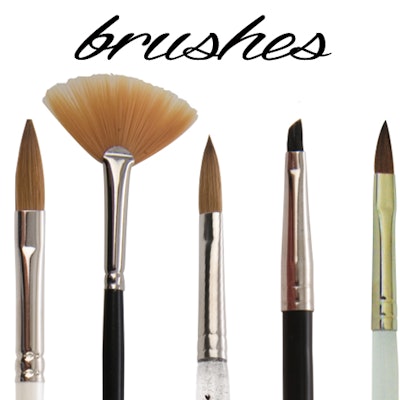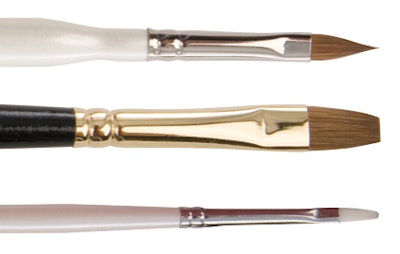
Whether you’re known for perfectly balanced pink-and-whites, natural-looking gels or one-of-a-kind nail art, there’s one tool you can’t be without—a great brush. Read up on the finer points of cleaning and replacing yours!
Cleaning and Storage
Keeping your brushes free of hardened paint or clustered acrylic begins by cleaning the brush between each use and at the end of every workday. Brush cleaner is readily available and easy to keep on your manicure table, but if it’s used during a service, it has the potential to contaminate paints, gels and acrylic product. So rather than submerging her gel brushes throughout the day, Amy Becker, nail technician and owner of Masterworks Innovations in Cedarburg, Wisconsin, gives the bristles a gentle squeeze and wipe between applications. “Simply pinch out any excess product in a clean wipe or paper towel between each use,” she says.
“Cleaning between applications and services should be just a dry wipe,” agrees Joanne Millar, head educator for en Vogue Sculptured Nail Systems in Langley, British Columbia, Canada. “At the end of the day, you clean the brush with brush cleaner.” Millar recommends wetting a pad with cleaner and then wiping down the brush with the saturated pad.
Removing all residue from your brushes is important not only to prevent product from mixing, but also to maintain the integrity of the brush itself. “You want to make sure that you get all of the gel out of your brush. If it’s exposed to UV light, the gel in the bristles will harden,” says Kristina Baune, a CND educator and nail technician at Ultimate Imagge in Redwood Falls, Minnesota.
Since cleaner can dry out the bristles of both acrylic and gel brushes, “do not submerge or soak brushes in cleaner for a long period of time,” says Jennifer Malone, marketing manager for OPI Products in North Hollywood, California.
For acrylic brushes, monomer does a good job of removing acrylic buildup and keeping bristles clean during application. Nail technician Jennie Merrill from Elite Nail Design in Columbus, Nebraska, uses only monomer on a daily basis to keep her acrylic brushes in tip-top shape. “The only time I use brush cleaner is on the rare occasion when I get dried acrylic in the brush; I use the cleaner to loosen and remove it,” she says.
To prevent fraying or disheveling the brush, reshape the bristles after cleaning them. Then, store the brush on its side or with the bristles facing up in a holder, “preferably in a dark spot that’s covered to protect the brush from dust,” Millar says. If the brush comes with a cap, allow the brush to dry for a few minutes and then cover it with the cap. You can store capless brushes in a drawer or under a towel to protect them from dust and dirt.
“I dry my brushes flat on a towel with plastic backing to absorb any excess moisture,” Baune says. “In addition to protecting brushes from dust, you want to store them in a non-airtight container or drawer.” In her salon, Baune uses a towel-lined plastic storage case with holes that allow air to circulate.
One additional concern for gel users, as Baune previously mentioned, is that gel product hardens when exposed to UV light. To prevent curing your brush between or after services, make sure the brush is not left out in an area where it could be exposed to direct or indirect sunlight.
New brushes often come with a coating or “seal” to protect the bristles. They need to be prepped to remove the coating before the first use. “Cleaning brushes for the first time is very important,” says Baune. “You’re preparing the brush for use and molding it into shape.” Manufacturers supply instructions on how to break the seal and prepare your brush for use.

The life span of a brush depends on two things—how many services you perform and how aggressively you handle the brush. “There is no hard-and-fast timeline,” says Millar. “You want to replace the brush whenever the bristles start to fray.” If you’re finding it difficult to control the flow of product or notice that your fine lines are sprouting errant roots, then it’s time for a new brush.
“If you press down on the brush and the bristles don’t snap back into place, the ‘snap’ of the brush is gone and it’s time to replace it,” Baune adds.
The good news is that you won’t need a lot of brushes cluttering up your station or storage bins. In fact, one brush should be plenty to complete a full acrylic or gel service—that’s one brush per enhancement system. “Using the same brush for different systems can cause contamination of product and service failure,” Malone says.
Merrill keeps three brushes at her station. “I’m very careful not to use the same brush with another brand of acrylic,” she says. But nail technician Heather R. Coulter from Silver Shears in Pensacola, Florida, finds that she needs only two brushes. “I have one acrylic brush and one cleanup brush for polish,” Coulter says. For gels, you want a brush with synthetic bristles “because the gel has a tendency to stick to the keratin in hair,” says Baune. “It won’t grab hold of synthetic bristles.”
The shape of the brush largely depends on personal preference. Becker recommends a tapered brush for acrylic and gel enhancements because it allows techs to create crisp smile lines and move in close to the cuticle area. Baune uses a size #10 acrylic brush with a bulbous belly and fine tip. “The belly of the brush holds the liquid, so a larger brush allows you to create both a large and small bead of acrylic, depending on how much liquid you pick up,” she says. “The fine point is great for corners and detail work, but you can also flatten the brush as you work to create the body of the nail.”
For nail art, “you will need a brush with a fine tip for details,” Malone says.
Handling the brushes at trade shows or your local beauty supply store can help you determine what feels right and which brush allows you the most control for acrylic, gel and nail art applications. “I always like to try new and different brushes,” says Becker, who recommends watching demonstrations at trade shows and educational events to preview different brush styles. “Feel free to ask questions and even ask to try the brush,” she says. “You never know when you might come across something that improves your application.” -Inga Hansen


