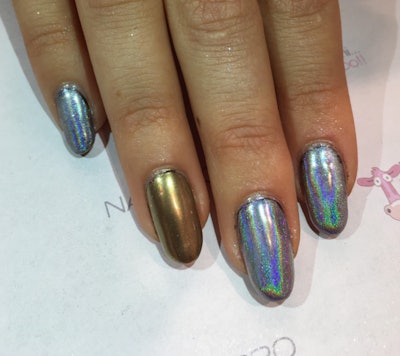
Holo nail are on the ups, that’s no secret. Whether you’ve recently discovered the wonders of holographic nails or have been following the trend since day one, the reflective look is not going anywhere. If you’re just getting started with pigment powders, whether it’s chrome or metallic or holos, keep scrolling for a quick look at the application process.
We went live on Facebook on Thursday with Andreina Landis, the president and co-founder of Mini Mani Moo, to go through the steps and find out what it takes to achieve a beautiful, shining holo nails. 
Products used:
Moo Gel Peel Off Clear Gel Base Coat
Moo Gel 1 Step Gel – Black
Moo Bling LED Lamp
Mess No More Liquid Tape
Magic Mirror Chrome Powder in Gold
Magic Mirror Holographic Powder
Follow these steps on how to create the holo look:
- After prepping the nail, apply a thin coat of the Moo Gel Peel Off Clear Gel Base Coat. Cure for 30 seconds under an LED lamp.
- Apply a dark gel base (we used black). Cure for 60 seconds. Repeat for full coverage if desired.
- Apply a thin layer of Moo Gel Chrome Non-Wipe, Non-Cleanse Top Coat. Cure of 30 seconds.
- Apply Mess No More on surrounding skin. Allow to dry.
- Use a silicone tool to pick up and apply chrome pigment powder. Mini Mani Moo has three finishes in gold chrome, silver chrome and holographic.
- Gently peel off Mess No More from the surrounding skin. Clean up any residue if necessary with a cleanup brush and alcohol or acetone.
- Complete the look with one thin coat of Moo Gel Top Coat Non-Wipe Non-Cleanse.

Replay the full demo below:
For more information, visit minimanimoo.com.
How are you creating reflective nails for your clients? Let us know in the comments below!


