Bellacures Nail Salon shares tutorials for three holiday nail designs, so you can be prepared to create looks for your clients that will be the talk of all the holiday parties.
Courtesy of Bellacures
Halloween is over, which means it's officially time to start prepping for holiday season!
Bellacures Nail Salon is sharing three holiday-themed tutorials that can have you ready to create gorgeous looks for your clients.
Under the Mistletoe
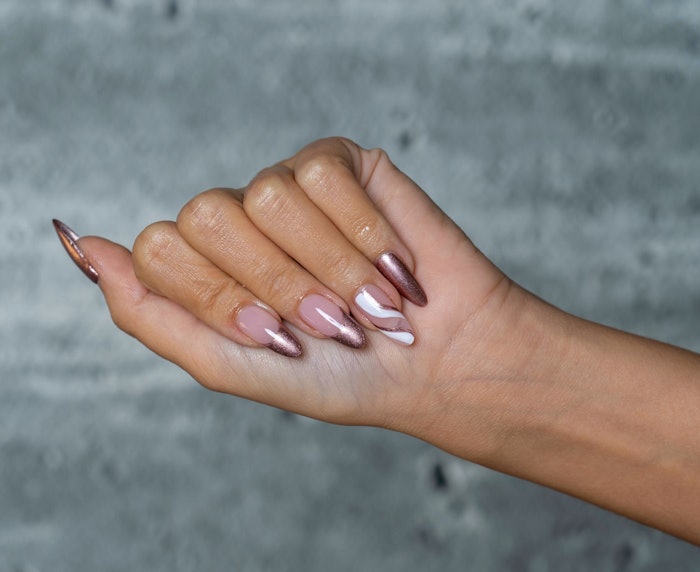
Meet us under the mistletoe with this totally kissable nail look! This mistletoe design gives a subtle, yet festive nod to the holiday season, and we are here to give you all the deets on how to achieve the look.
 Under the MistletoeCourtesy of Bellacures
- Begin by completing cuticle care and filing the nails into a square shape with slightly rounded edges.
- Next, take your favorite metallic wine-red polish, and apply two even coats on the fingers without the mistletoe design. Repeat this same process with a cream nude polish that suits your client's skin tone on the two fingers with the design. For the best results, make sure to allow the proper dry time between each coat of the base polishes.
- For the fun part of the design process, take your dotting tool with the same metallic red polish, and place three dots in a triangular shape.
- Next, on a thin line brush take a dark green polish and draw two small lines slightly diagonal from your red dots. Once you have your two lines, feather out a few smaller lines on each to create your leaves.
- Now that the main part of the design is complete, using the same dotting tool, place a few white dots around the mistletoe to add that little extra oomph.
- Finish off with your favorite topcoat, and cuticle oil for maximum shine!
Scattered Snowflakes
Baby it’s cold outside, just like this icy mani!
 Scattered SnowflakesCourtesy of Bellacures
- To start off this look, the most important step in any manicure is to complete the proper nail prep. Once you’ve completed cuticle care, file the nails into a square shape with seamless rounded edges.
- Now that nail prep is complete, using a sheer nude polish, evenly coat the nails to serve as the base color for the snowflake design.
- Next, take a bright white polish on a dotting tool, and place one dot in the position where you would like the middle of the snowflake to begin.
- Once your center dot has been placed, dot around the middle circle carefully until fully surrounded.
- After this, drag a thin line brush from the center dot through the other dots to get the perfect snowflake effect. Allow dry time, and dap on some of your favorite glitter polish near the center of the design where your middle dot is placed.
- Finish off the design with a shiny topcoat, and some cuticle oil for the perfect glossy effect.
Santa French Mani
A festive mani that would have Mrs. Claus jingling all the way to the salon! This tip of the hat to the man in red is sure to guarantee your spot on his nice list.
 Santa French ManiCourtesy of Bellacures
- Begin by completing your cuticle care and shaping your nails into a squared shape with rounded edges.
- Now that your nail prep is complete, apply two even coats of sheer pinky nude polish to serve as the base of this nail design. As always make sure to allow some dry time in between each coat of polish.
- To start this design, take your favorite merry and bright red polish on a thin brush, and apply it to the tips of your nails. To ensure the most precise application, paint the tips with slow and steady brush strokes to guarantee a perfect application every single time.
- Once you’ve created the outline for your festive Frenchies, make sure to go back in with a second coat to carefully fill in any gaps to make sure your tips are as bright as possible.
- Using the same brush, take your ring finger and draw an upside-down triangle from the corner of your nail bed to about the middle of your nail, and drag it back up to the tips in a diagonal motion. This upside-down triangle will be the base of our Santa hat.
- To finish off the hat, take a cream white polish on a dotting tool and dot this along the base of your red hat.
- Finish off the hat with a white dot at the tip of the triangle, and Santa baby we are done!
- Apply a topcoat for maximum mani shine, and to minimize the likelihood of chipping. Finish off with some cuticle oil, and you are ready for any and all holiday parties!
You can visit Bellacures website and follow them on Instagram for more.


