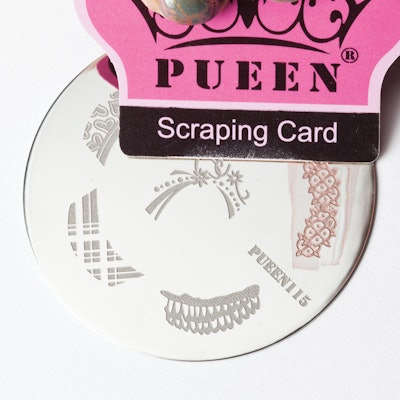
Nail stamping isn’t an entirely new art (those who did nails back in the 80s can contest to this), but it has recently re-entered the world in an explosive way. Tons of companies now offer their own stamping plates, tools, and even opaque polishes meant specifically for the technique, include professional brands like Young Nails and Gel II. While some artists argue over whether nail stamping is “cheating,” realize that the actual method of stamping is a challenge to master and requires a creative eye to incorporate into classy designs your clients will want to wear again. Try it as a French, stamp over an ombre, mix with other nail art, or even layer different colored stamps together. If you haven’t already tried it out yet, read on for our essential tips and a step-by-step guide.
Quick Tips
• Before starting, lay out all of your supplies. You don’t want the lacquer to dry on the plate while you’re looking for your stamper.
• Apply a base color and then add a layer of top coat, allowing it to dry before you stamp. If you make a mistake while stamping, use either tape or a lint-free wipe dipped in acetone to lightly remove the design from your nail without having to redo your base.
• Make cleanup faster by applying tape around your cuticle before stamping.
• Acetone can damage soft silicone stamping heads. Instead, use packing tape or a lint roller to quickly clean off old polish from your stamper.
• After stamping, give your nail a moment to dry. When you add top coat, do so in as few strokes as possible and allow it to “float” over the design; don’t drag the brush. This can smear your design.
• When using your scraper, don’t scrape the plate too hard, as it can pull out too much polish from the engraving.
• Be sure to press the stamper firmly down onto the plate to pick up all of the color.
• If you’re having a tough time transferring large designs, turn your stamp into a decal. First, paint a thin layer of top coat on wax paper, let it dry, then stamp your design directly over top. Once dry, use tweezers to carefully remove the thin layer of polish from the paper and adhere it smoothly to the nail.

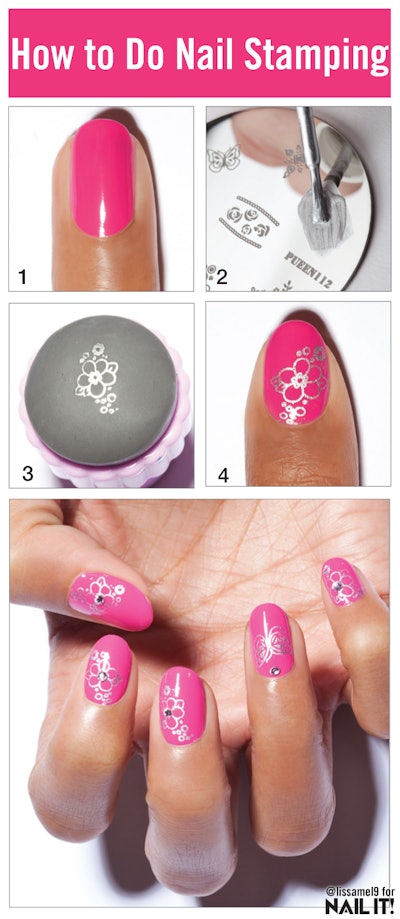
1.) Apply two coats of pink polish to the nail. Apply top coat and allow it to dry.
2.) Select an engraving that is a stand-alone shape (think: a single flower, butterfly or bird, rather than a pattern the size of a whole nail). Paint silver polish across the etching. Use the scraper to remove the excess lacquer.
3.) Pick up the polish with the stamper by pushing down firmly onto the plate. Before you stamp, hover the stamper above your nail and eyeball where you want it to appear on the nail. A smaller stamping head makes it easier to aim where you want to place small shapes.
4.) Stamp similar designs on your other nails, but switch up the placement of each for more visual interest. Use top coat to adhere rhinestones as desired. Finish with another layer of top coat over the entire design.
-Sarah Emick
Read: Where Do I Buy Stamping Supplies?
[Artist: Melissa Fisk (@lissamel9); Images: Armando Sanchez]


