Durable, long-lasting dip enhancements are ideal for on-the-go clients, especially during the hustle of the holiday season. But what happens when something goes amiss? “Dipping powder provides beautiful results and is currently in high demand, but it can be a mess if done incorrectly,” says Marilyn Garcia, Cuccio global director of education and brand ambassador. Here, Garcia walks us through solutions to some of the most common dipping powder problems: lifting, cracking and expanding.
The Problem: Lifting
Lifting occurs when dipping powder doesn’t properly adhere to the nail. As with lifting of all types of enhancements, this issue stems from the prepping stage of the service. The nail plate must be free of debris and moisture to ensure proper adhesion.
The Solution
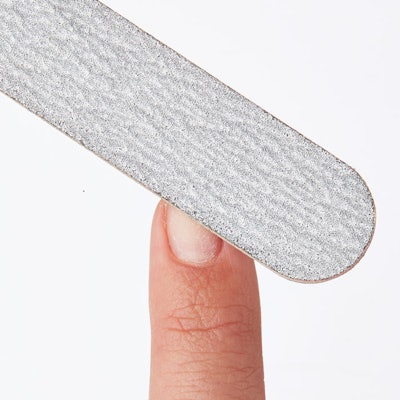
Take extra time with your prep steps if you find that clients’ dip nails are lifting. Use a good cuticle remover to release any dead skin from the nail plate. “I like to use a 180-grit file to lightly buff the surface of the nail; it gives just the right texture to the nail surface to promote adhesion,” says Garcia. Follow with a primer to dehydrate the nail before applying the base.
RELATED: Our Readers Submitted Festive Nail Art Designs Just in Time for the Holidays
The Problem: Cracking
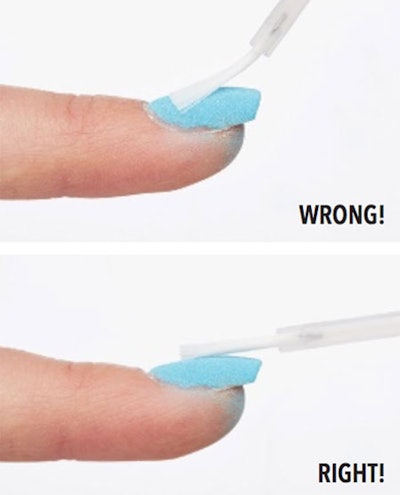
Vertical cracking occurs when the product is applied unevenly between layers and coats. The angle in which the brush is held plays a critical role: “If the brush is tilted upright and perpendicular to the nail, product builds unevenly and creates hills and ridges, which can lead to cracking,” says Garcia. Likewise, dipping the finger into the powder at 90 degrees (i.e., straight up and down) will also lead to an uneven surface.
The Solution
To ensure even application, hold the brush parallel to the nail, moving it from the cuticle to the free edge in long strokes. Then, guide the nail into the dipping powder at a 45-degree angle to ensure a smooth powder surface.
RELATED: Holiday Gift Guide 2018 – Gifts Ideas for Every Nail Artist
The Problem: Expanding
Maintaining color within the boundaries of the nail can be difficult—even when using thin coats and layers of product. “Dipping powder absorbs product quickly and tends to spread over sidewalls and cuticles if it isn’t properly applied,” says Garcia.
The Solution
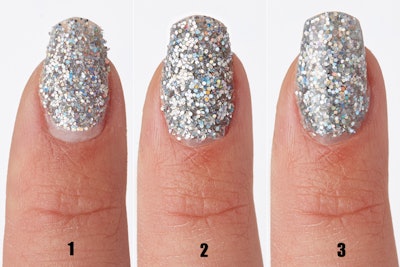
Apply adhesive on three-quarters of the nail, leaving a small margin below the cuticle. Dip the finger in the first coat of dip powder at a 45-degree angle. Tap off the excess. Apply a second coat of adhesive, this time leaving only a sliver of space below the cuticle. Repeat the dipping process. Working in small increments—even dipping up to three times—getting closer to the cuticle as you apply will help avoid flooding the cuticle and side walls with color.
Glitter Wars
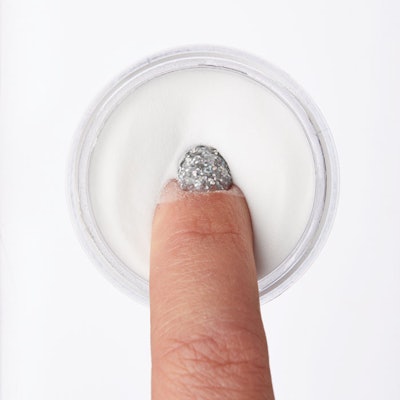
Working with glitter can be tricky no matter what the medium, and glitter dip is no different. “Glitter dipping powder is coarser and contains larger particles than basic color powders, so it tends to get bulky with each coat,” says Marilyn Garcia. After the second coat of glitter dip, apply a third coat of adhesive, and guide the nail into clear dipping powder to cover the entire nail, encasing the large glitter particles without bulking or expanding past the cuticle or sidewalls. Garcia teaches this process with the mantra, “Glitter, glitter, clear!”
Practice Your Dipping Powder Techniques with These Must-Have Products
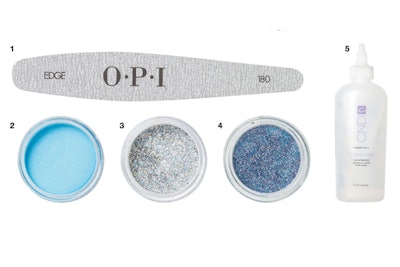
1. OPI Edge 180 Grit File
2. REVEL NAIL Dip Powder D123 Playful
3. CUCCIO PRO Powder Dip Polish Deep Silver Glitter
4. SNS Gelous Color 319
5. CND CuticleAway
–by Angelina Lewis
[Images: Courtesy of Armando Sanchez and Brooks Ayola]


