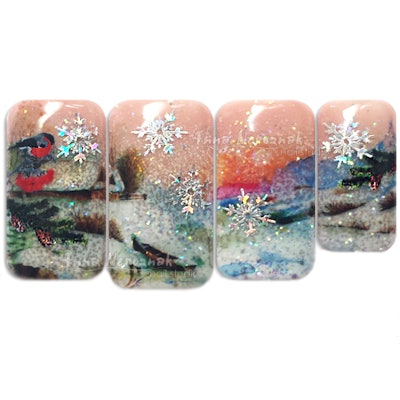
As cold weather approaches, it’s time to hone your skills with snowflakes and sparkle! Anna Neroznak of RDCorp shared how she created an entire winter scene using a few decals combined with gel. See her tutorial and see which decals she used.

Supplies needed:
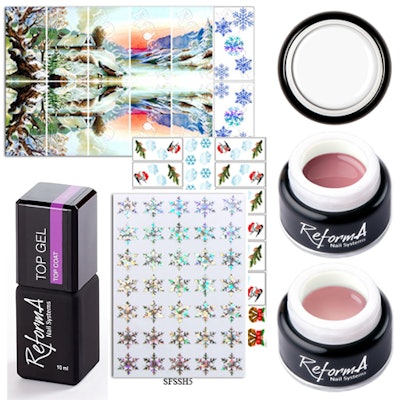
- Cover Pink Gel
- Ultra White Gel Paint
- RDcorp Photo-Design Winter Pro Collection 02-09
- Watercolor Paints
- Kolinsky Brush N1
- RDcorp HD Winter Photo-Design 12-08
- RDcorp Snowflake Sticker
- Any sculpting gel
- Finish or Top Gel
All materials are available at select local distributors or here: ?www.shopnailart.com.
??

Step 1: Prep nails as usual (remove natural shine with soft file 220/220 or 180/180 grit), dehydrate with Nail Prep, apply Ultrabond Primer. Cover nails with Base Gel (cure 2 min in UV lamp or 60 sec in LED) and apply Cover Pink Gel (cure 2 min in UV lamp or 60 sec in LED). Wipe off dispersion (sticky) layer with Cleanser. Buff the surface of the nails with Pro Buffer 220/180.
?Step 2: Use a sponge to apply Ultra White Gel Paint, cure it carefully for (3 min in UV lamp or 60 sec in LED).
?Step 3: Add transparent blue glitter mixed with clear gel; cure it.
?Step 4: Wipe off sticky layer, buff surface gently with ProBuffer 220/180 and apply RDcorp Photo-Design Winter Mix 9. Do not forget to leave 1 cm all around the edges.

?Step 5: Use Kolinsky Brush N1 and Watercolor Paints to camouflage all seams and edges.
?Step 6: Now to create the foreground and background. The decal is transparent, so it creates a great background landscape. Let’s add some details at the foreground to achieve a three-dimensional effect. Use a bird and branches from RDcorp HD Photo-Design Collection.
?Step 7: To add more glimmer and shine use RDcorp Holographic Snowflakes.
?Step 8: Cover the whole design with your favorite sculpting gel, buff and file the nails to their final form, apply Finish Gel and your winter story nails are ready! ??
[Courtesy of Anna Neroznak]


