
Chrome nails are not going anywhere. While most nail pros have tried the technique, not everyone is applying the products correctly, says Greg Salo, president of Young Nails.
To help troubleshoot any application issues, Young Nails has introduced the Chrome Obsession Kit that includes a 1 Base Gel, 2 Liquid Chrome, 2 Pigment Chrome, 3 Sealer and 4 Top Gel to allow you to execute the brush chrome and mirror chrome effects that will last.
To show you how to do it right, the nail pro visited our studios for a live demo. Follow the steps below to find out how to create both looks:
Brush Chrome
A photo posted by Nailpro Magazine (@nailpromagazine) on
- Prep the nail and apply Protein Bond to avoid any issues with separation and lifting.
- Apply a very thin layer of 1 Base Gel. Cure in an LED lamp for one minute or two minutes in a UV lamp.
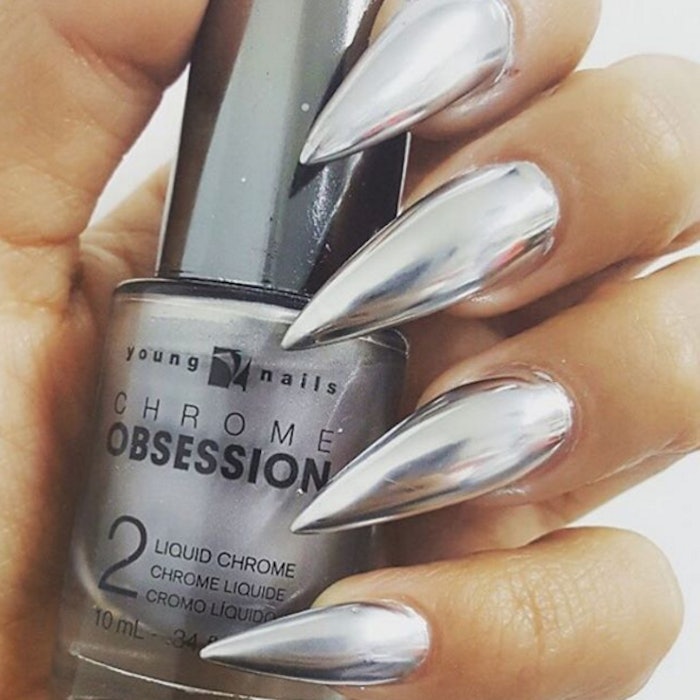
- Shake 2 Liquid Chrome before application to distribute the pigment. Use the tip of the 2 Liquid Chrome brush to apply a very thin coat. Since the product is very fluid, apply the liquid chrome using gentle, light and smooth strokes. This will prevent the brush from splitting and streaking. Allow to dry.
- Take 3 Sealer and apply a very thin layer to lock the chrome and prevent chipping. Cure in an LED lamp for one minute or two minutes in a UV lamp.
- Seal the entire brush chrome look with 4 Top Gel for a high shine. Cure in an LED lamp for one minute or two minutes in a UV lamp.
Mirror Chrome with Stamping
- After creating a nail enhancement, prep the surface of then nail. Use a medium grit band or a medium grit hand file to create texture. Cleanse the nail to remove debris.
- Apply Protein Bond over the surface of the nail.
- Apply a very thin layer of 1 Base Gel. Cure in an LED lamp for one minute or two minutes in a UV lamp. Editor’s note: If you want to achieve a colored chrome effect, you must apply the color gel polish before the 1 Base Gel.
- Before applying the chrome pigment powder, take the pigment powder jar and flip it upside down. Some of the pigment will stick to the lid and that’s the amount you need to complete a set and prevent a mess. Take a makeup sponge to pick up and apply the chrome pigment to the nail.
- Use a dry wipe to remove any loose pigment and remove the glittering effect to create a mirrored look.
- Load your stamper with a Caption polish, scrape off the excess, load the stamper and apply it to the nail.
- Apply a very thin layer of 3 Sealer to lock the chrome and prevent chipping. Cure in an LED lamp for one minute or two minutes in a UV lamp.
- Seal the design with Top Gel for extra shine and cure. Clean up around the edges and apply cuticle oil to restore moisture

Replay the full demo below:
For more information, visit www.youngnails.com.
Have your clients been asking for chrome nails? Let us know how you did them in the comments!
-Sigourney Nuñez


