By Natalie Minerva
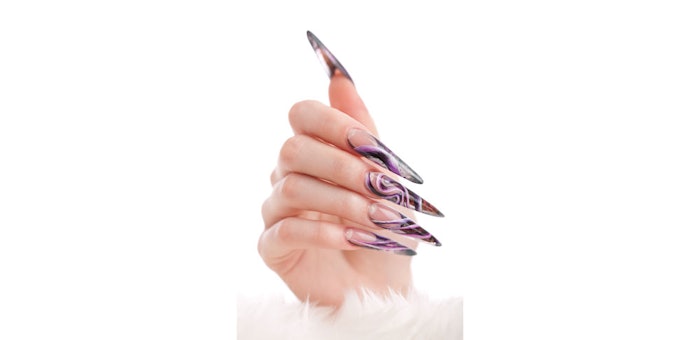
Nail trends may come and go, but one style has stood the test of time: elegant, elongated nails. Whether the nail set is dripping in Swarovski crystals, supporting a social movement or paying homage to a favorite cartoon character, clients want lengthy nail looks that help flaunt their unique style. To best support showstopping nail art, techs must often lengthen the nail using tips. Here, nail artist Natalie Minerva shares tips and tricks for fitting the tip to the client’s nails, flash curing/adhesion, shaping and more. Plus, we take a closer look at the Aprés Gel-X Nail Extension System.
Extension How-To
1. Prep nails using a gel manicure prep method on natural nails.
2. Apply pH Bonder to the fingernail.
3. Apply Non-Acidic Gel Primer to the fingernail.
4. Apply a thin layer of Extend Gel onto fingernail.
5. Cure Extend Gel on fingernail with LED lamp for 30 seconds or two minutes for a UV lamp.
6. File the underside contact surface of the Gel-X tip.
7. Apply Extend Gel (enough to cover natural nail) to the underside contact surface of the Gel-X nail tip.
8. Use thumb to press Gel-X tip onto fingernail gradually from the base until the gel flows to the free-edge of nails.
9. Keep thumb pressed down on Gel-X tip and nail. Cure with X-Lite for 10 seconds. Rotate thumb and X-Lite around Gel-X tip to ensure all sides cure.
10. Cure entire hand in LED lamp for 30 seconds or two minutes for a UV lamp.
Advice for Sizing the Nail
“When sizing the nail, I always go as snug as possible,” explains Minerva. “It’s almost better to go a little smaller rather than bigger. If you do happen to see that the extensions are slightly smaller than the natural nail widthwise, you can always fill that space in with a little base gel. If the extensions are too wide, they will more prone to popping off and looking thick.”
Flash Curing/Adhesion Tricks
“When flash curing the extensions on, I press pretty firmly,” Minerva says. “Although the Aprés system is fairly foolproof and the adhesion between the gel and the extension is excellent, it’s important to add that extra pressure so it really hugs the nail.”
Minerva suggests estimating as accurately as possible how much gel is needed so as to not have too much gel oozing from the free edge. “It’s not so much an issue in terms of wear and tear but rather it is annoying and bothersome for the client to have residual gel under their nails.”
Filing and Shaping Recommendations
Before filing, Minerva will cut the free edge of the nail and make sure all free edges are equidistant in length and proportional to the corresponding finger. She files with speed rather than pressure, which helps achieve an even, consistent shape through the manicure. Using a foam buffer, she then buffs the entire set. The final step is one that Minerva considers vital: “I clean up any extra gel that may have oozed out of the cuticle area. This will make for a streamlined, clean color application.”
Gel/Lacquer Application
Some people choose to wipe the nails with acetone and directly apply color to the Aprés extension, but instead Minerva applies a base gel. “I find my manicures last longer if I do this.” As for nail art, Minerva gushes, “The beauty of these extensions is the amazing flexibility they have in terms of design, so have fun with it! Jelly colors look fantastic on Aprés extensions.”
Lengthening Lowdown
Tips for the Removal Process
The removal of Aprés Gel-X tips is just as quick and easy as the application, Aprés says. Techs are instructed to simply cut down the tip and file off any top coat, color and some of the bulk of the Gel-X tip. To finish the removal process, techs should soak off the remaining tip with acetone.
When it comes time for a fill, Aprés recommends removing the old set and applying a fresh, new set. Gel-X tips are carefully designed to optimize the apex, sidewalls and length. According to Aprés, the tips have the correct balance and strength for nail extension application; however, when it is time for a fill, the extension has moved down the length of the nail. The apex must now be rebalanced, which requires a higher level of skill to create a smooth and structurally sound fill. Gel-X tips are meant to save on time, dust and effort. By taking the time to file down the extension, fill in with gel and recreate a new apex, the convenience and ease of the Gel-X tip has been lost. Removing an old Gel-X set and replacing it with a new perfectly balanced and shaped set is much faster and results in a more reliable and beautiful finish.
Troubleshooting: Do’s and Don’ts
A critical step for lasting nails is to always apply the nonacidic gel primer on both your natural nails and the underside of the extension for the gel to adhere well, Minerva urges. When buffing the extension before applying the base or color gel, make sure to buff the free edge and sides, she adds. “When you file the extensions, it can cause a bit of fraying so I like to smooth that edge for a super clean set.”
A Closer Look at Aprés Nails
Full-coverage gel tips from Aprés Nails are offered in a variety of shapes and lengths. The tips’ special formulation is made of a component found in soft builder gel and are not made of ABS Plastic. In fact, according to Aprés, the ingredients are not compatible with ABS Plastic.
How Gel-X Tips Are Made Compared to a Traditional Plastic Tip
The secret of Gel-X tips is in the manufacturing process, Aprés explains. When pressing the gel formula into the custom molds, an incredible amount of heat is applied, which changes the molecular structure of the ingredients in the Aprés gel. This heating process strengthens and hardens the gel, making it 10x stronger than its original form all while maintaining its ability to easily soak off like a soft gel. According to Aprés, this makes Gel-X one of the most versatile methods of nail extension on the market.
What Is the Difference in Wear?
Aprés explains that Gel-X tips were developed to wear and feel like your natural nail. A regular ABS plastic tip is not flexible or strong enough to be used alone, it must be glued with super glue, then overlaid with another product like hard gel or acrylic. These additional steps increase the weight in wear and thickness. Gel-X tips are made flexible enough to be molded and customized to each individual fingernail, their chemical properties and flexibility strength.


