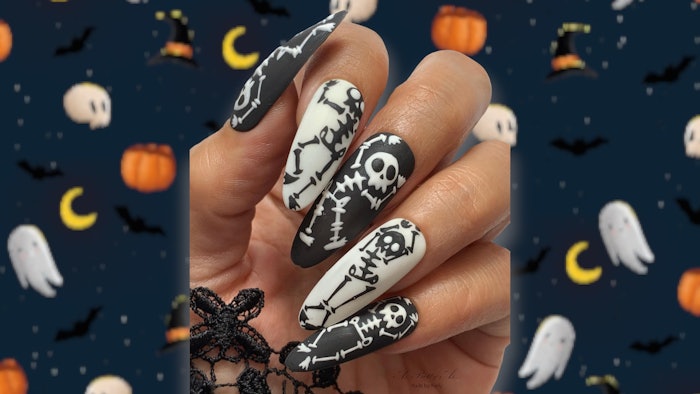
Magpie Beauty Brand Partner Kelly Scothorn shares how to create skeleton nail art perfect for spooky season.
Courtesy of Kelly Scothorn
Spooky season is in full swing!
To celebrate, we asked U.K.-based nail artist Kelly Scothorn (@asprettyas_nailsbykelly) to provide a step-by-step tutorial for how she created her dancing skeleton nail art.
 Step-by-step skeleton nail artCourtesy of Kelly Scothorn
How-To:
- Apply two coats of gel color to the nail, then cure. Apply a matte top coat, or wipe away the inhibition layer for a matte surface. Using white gel paint, apply the main ribs of the skeleton in the center of the nail. Flash cure.
- Using the tip of your brush, add a slightly angled line at the base of the ribs and a small circle either side. Cure.
- Extend the left side of the hip to create a bent knee, and add a tiny line to begin the foot. Bring down a long, thin line at an angle for the other leg, and, again, add a small line to begin the foot. Flash cure.
- Draw a segmented line for each of the raised arms. Once you’re happy with the angles of your lines, cure.
- Using the very tip of your brush, add small lines for the skeleton's joints (e.g., elbows, knees, wrists).
- Add a dot of gel paint to the hands and feet before curing, then use a detailer brush to gently pull out points for the toes and fingers. Cure.
- For the skull, paint a large circle in the space between the arms. Carefully draw three teeth by dragging the gel paint downward. Round the teeth, and reshape as needed. Fully cure.
 Spooky!
About the Artist:
Nail tech and artist Kelly Scothorn is based in Derbyshire, England. Check out more of Scothorn's work on Instagram.


