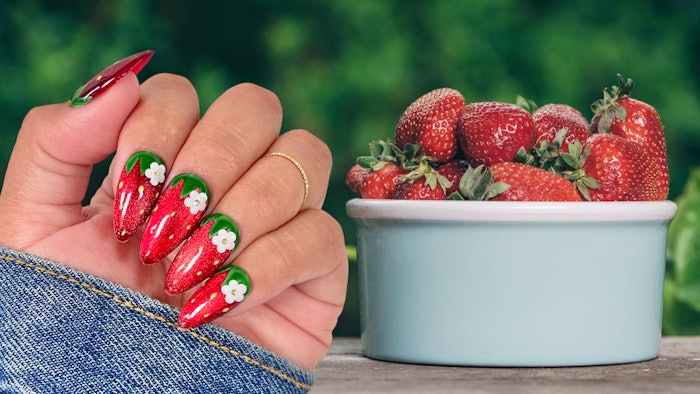
Nail artist Jeanette Flores shares her tutorial for creating strawberry cat eye nails perfect for this upcoming summer season.
Courtesy of Jeanette Flores (@nailartbyjen)
If you are looking for an extra sweet nail tutorial for this summer, look no further!
Nail artist Jeanette Flores (@nailartbyjen) shares how she created a strawberry cat eye nail look using products from Daily Charme.
You can follow her tutorial below to create this look for your clients.
 Nail artist Jeanette Flores (@nailartbyjen) shares how she created a strawberry cat eye nail look using products from Daily Charme.Courtest of Jeanette Flores (@nailartbyjen)
How-To:
- Start by applying a layer of Cosmopolitan as your base, and cure.
- Then, take your silver cat eye, Whiskers, and apply a generous layer. Don’t cure
- Take the Magnetic Cylinder Wand and start magnetizing around the nail to push all the cat eye shimmers to the center of the nail. This will ensure that the cat eye is at its maximum shine. If you are having trouble with the magnet and the shimmer is disappearing instead of moving, don’t cure. Just brush out the layer of cat eye and that should reset the gel, so you can try magnetizing again.
- Once you have the cat eye layer magnetized to its complete shine, cure it quickly. If you don’t cure it quickly, the shimmers of the cat eye may shift back, and you'll lose the maximum shine.
- Then, add another layer of Cosmopolitan on top of the cat eye, and cure. You’re basically sandwiching the cat eye. This gives the look more depth and dimension. It helps the strawberries look dazzling.
- Take Perfect White, and draw the strawberry stem towards the cuticle area. Cure. Cover the stem with Lost Forest, and cure.
- Next take a detailing brush, and using only the tip of the brush, dip into Baby Chicks. Start adding the strawberry seeds. Make sure you cure, then wipe off the sticky layer that’s left. This will help our sticker adhere better.
- Take a flower sticker from the Daisy Smileys sticker sheet, and stick it near the stem. Make sure you press the sticker completely flat.
- Finish with Diamond Shine Top Coat, and that’s it! You have some trendy and cute strawberry nails.


