Learn how to create fall floral nail art from Ashley Biasella.
Courtesy of Ashley Biasella (@badash_nails)
Ashley Biasella (@badash_nails), nail artist and Light Elegance educator, has created fall floral nail art.
Floral nail art is a timeless, evergreen trend that clients will always be asking for. Below, you can learn the step-by-step for bringing this look to life.
How-To:
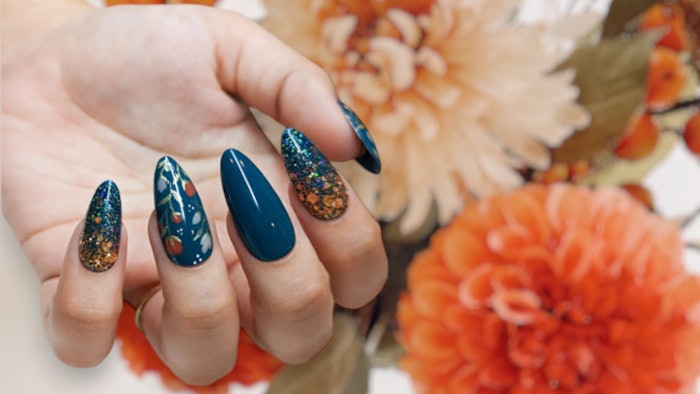
 Fall floral nail artCourtesy of @badash_nails.
- Apply two coats of a jewel-toned, blue-green color.
- Using a swirly brush and a circular motion, apply a medium gray color in small flower patterns, and cure.
- Using the same method as Step 2, apply a red brick color in the open spaces, and cure.
- Using the swirly brush and a gold UV/LED color gel, apply vines and leaves, creating petals up and around the flowers with varying pressure of your brush.
- Using white gel paint and a needle point stylus, add small dots to highlight the spaces that are left.
- Top with a UV/LED top coat, cure and cleanse.


