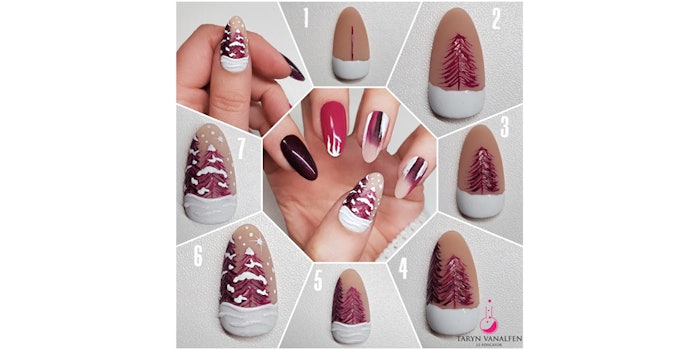
3D Snowy Tree Step-by-Step
Courtesy @taryns.nails
Taryn VanAlfen created this snowy tree holiday look, using Light Elegance products.
See how she accomplished it:
- Paint a white snowy ground using Just White ButterCream.
- Using Chairlift Chit-Chat ButterCream, paint a pine tree.
- Using Pucks and Penalties ButterCream, Bunny Slopes ButterCream and Toboggan Time! ButterCream, add more branches to create some dimension to the tree.
- Paint another tree using the same colors, but use more of Pucks and Penalties to make this tree darker.
- Top the nail with Flat Matte Top Coat, and paint some dimension on the snowy ground (before curing, sprinkle on an Light Elegance pretty acrylic powder or loose glitter to give the snow some sparkle, and make it 3D).
- After curing, paint snow onto the trees and falling from the sky.
- Add more of the glitter or powder, cure and then dust it all off!


