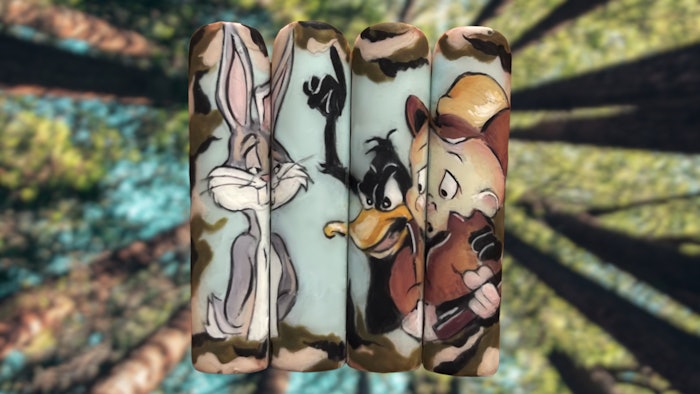
“SHH… Be vewwy quiet. I’m painting wabbits!”
If you want to channel your inner Elmer Fudd, you can with this Looney Tunes nail art how-to from U.K.-based nail artist Rachel Hanks (@rachelh_nails_).
Taking around 2.5 to 3 hours to complete the design, Hanks was inspired to create this set after taking up pest control in her spare time.
This design also inspired her to create nail trace tabs that she launched in her store Print By Example. "Techs can draw, trace over in gel polish on the trace tab and remove as a decal to apply onto a nail prior to client's appointments," Hanks says, describing her product.
You can see the product in action with this helpful graphic!
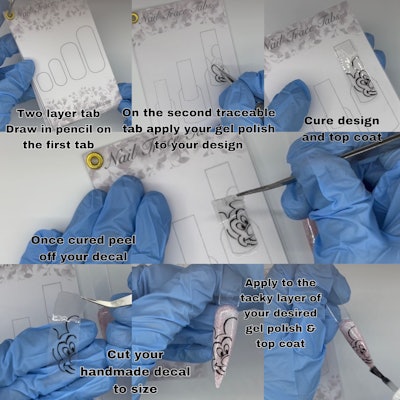 Hanks created nail trace tabs to help nail artists practice more complicated and detailed nail designs.
Looney Tunes Nail Art How-To:
1. Prep nail tips and apply gel polish color for the nail background. Hanks used blue tac to keep the nails positioned into place while she drew the design on the nail.
2. Add velvet matte top coat, so you can draw onto the nail in pencil.
3. For a thinner and smoother consistency, use gel polish to color in the design. Hanks mixed gel polish colors and blended into darker and lighter colors while wet before curing.
4. Add a matte top coat in-between to smooth out the painting. The thinner your gel polish application, the better. A little goes a long way.
5. Seal your design with top coat. Buff any bulk, and re-apply your shiny or matte top coat. Hanks added camouflage before finishing her nail design as she felt the characters didn’t pop like she wanted them to.
And that's all folks! You can see Hanks' step-by-step nail process in her recent Instagram post!
Follow Nailpro on Instagram and subscribe to our free daily newsletter to receive the latest news for nail professionals.


