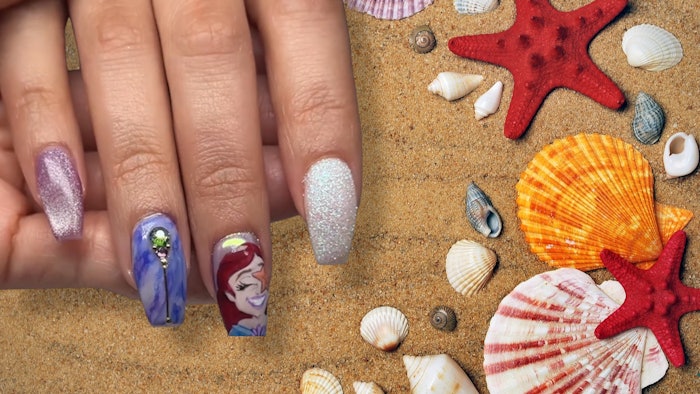
Wish I could be part of that world...
You CAN be part of the mermaid nails trend with this nail art tutorial from Nguyen Nhung (@beautybynoon)!
Nhung mapped out her design before getting to work on the actual set. See her illustration and full tutorial below. "I find this very helpful in figuring out what to do, so it won't take as much time," she told Nailpro.
 Nhung sketched out her ideas for her mermaid nail set before painting
Mermaid Nail Art How-To:
1. Apply your desired base coat. Think The Little Mermaid! Nhung used nude, white and purple base colors.
2. Add tints of blue and purple on the nude nail base. Then, add a chrome color or powder to the purple nail.
3. Apply cateye using hypno gel on the tinted purple nail.
4. Apply water marble on one of the white nails.
5. Apply non-wipe top coat and pour fairy dust on nails before curing.
6. Draw the silhouette of Ariel. Slowly fill in her skin color first, then her hair color.
7. Paint on Ariel's facial expression, and cure when finished!
The look took two hours to design and four hours to complete in total, which Nhung shared on her Instagram post below. "This was a mission, but I find it so exciting when I’m done...So grateful for my clients and their patience!," she wrote.
Share your mermaid nail art with us using the hashtag #nailpromermaidnails!
Follow Nailpro on Instagram and subscribe to our free daily newsletter to receive the latest news for nail professionals.