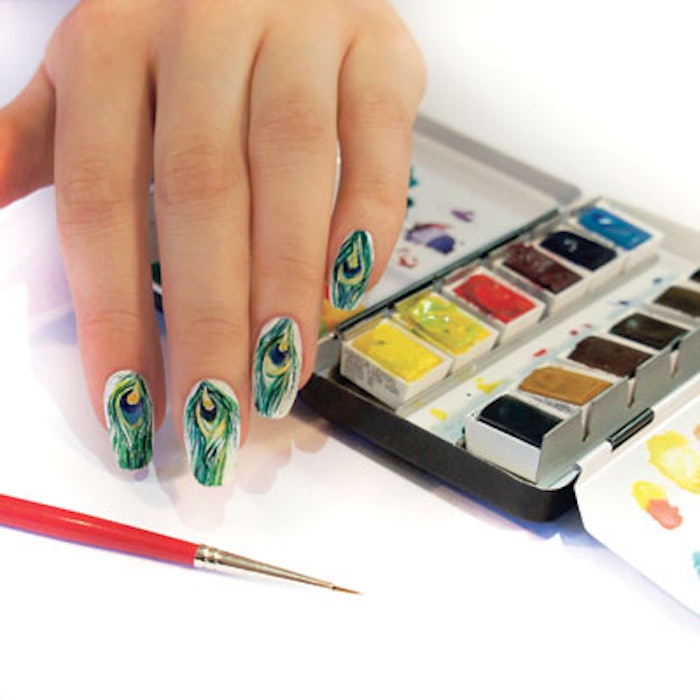
Seeking the next nail art trend? Look no further than aquarelle. Also known as watercolor, the technique is borrowed from the world of fine art. Here, nail artist Sam Biddle shares her method for easy, breezy aquarelle nails.
The Artist’s Way: How to do Aquarelle, The Newest Nail Art Trend
Seeking the next nail art trend? Look no further than aquarelle. Also known as watercolor, the technique is borrowed from the world of fine art. “In this design, I’m using the traditional method of watercolor that you would typically find when painting on paper,” says international nail artist Sam Biddle. “It doesn’t require precision. In fact, the looser, the better.” Here, Biddle shares her method for easy, breezy aquarelle nails.
Step 1
 First, paint your base coat.
Prep the nail and apply two coats of white gel polish followed by a matte top coat; a matte finish is preferred as it makes for a better surface to apply the watercolor. If using regular top coat, buff the shine off the surface with a soft 250-grit buffer. (Note: There should not be any demarcation lines on the surface.) For the design, choose water-based paint colors, and mix together dark turquoise and acid green.
Step 2
 Next, dip a wet brush onto the center of the nail.
Dip a brush into clean water and apply it to the center of the nail.
Step 3
 Add a small amount of turquoise polish to the nail.
Then, add a small amount of turquoise to the water on the nail. Let it sit for 10 seconds before adding the second color.
Step 4
 Add green polish and let the colors mix together.
Add a small amount of green and allow the paint colors to mix. DO NOT overwork the colors with your brush. The water will evaporate, leaving a watercolor effect.
Step 5
 Dab off excess paint and water with a tissue paper.
Repeat steps 3-4. Then, using a tissue wrapped around your finger, gently dab off any excess water and paint. (This will remove some of the second layer of paint, but will add additional texture.) Apply top coat to seal in the watercolor design, or continue to steps 6-8 to create a peacock feather.
Step 6
 Create your peacock feather with a size 00 brush.
To create a peacock feather, do not apply top coat. Using a size 00 brush, add fine lines to create detail. Use a light green paint color at the center and a darker shade as you move toward the edge of the design.
Step 7
 Paint a dark blue half moon onto the center of the feather.
Next, paint a dark blue half moon at the center of the feather. Using a small amount of water on the tip of your brush, touch the edge of the half moon to blend the paint color.
Step 8
 Add a gold teardrop to the nail design.
Then, add a gold teardrop shape to the center of the design.
Step 9
 Top the design with a matte top coat.
To finish, apply a matte top coat.
For more nail art tutorials, don’t forget to check out this month’s issue of Nail Pro online or in print!
Have you tried aquarelle before? What do you think of the technique? Share your thoughts with us on Facebook!


