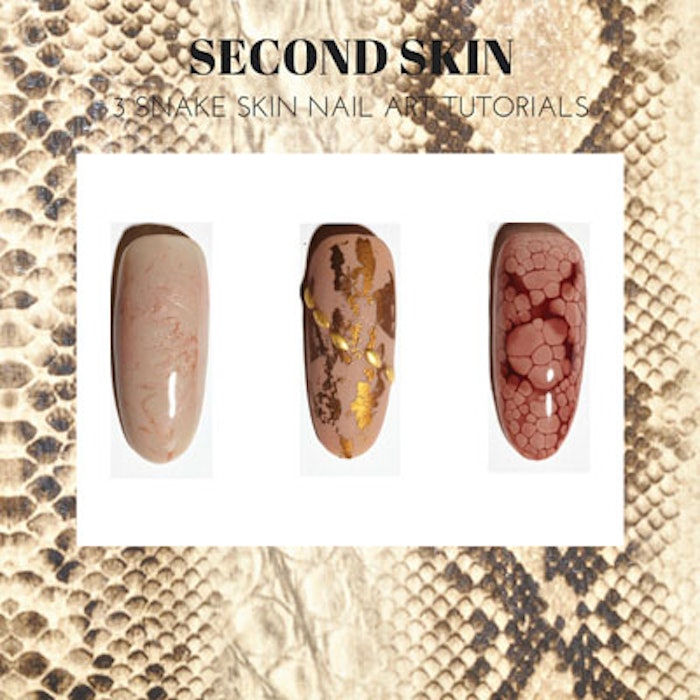
Take a walk on the wild side with exotic python prints and textures. Here, three step-by-step tutorials for three snake skin nail art looks.
Second Skin: 3 Snake Skin Nail Art Tutorials
When it comes to animal prints in fashion, there’s nothing more luxe than a beautiful snake skin. Today, nail artist Tatiana Grigorash, owner of TeanaNails Studio in Sherman Oaks, California, is teaching our readers how to create three beautiful snake skin nail art looks with these simple tutorials.
Keep scrolling to learn how to recreate these simple, yet high-fashion nail designs.
#1: Inspired by…
 To create this luxe look, Tatiana draw inspiration from this couture white snake skin crossbody.
Get the Look
Step 1
 Apply two coats of a taupe gel polish.
Apply two coats of taupe gel polish, curing after each.
Step 2
 Start sassing it up with a pink and rose gold line drawn down the center.
Using a thin striping brush, paint a wavy line in light pink down the center of the nail. Then, paint two shorter wavy lines in glittery rose gold. Do not cure.
Step 3
 Gently blend the colors together.
Gently blend the colors together with a brush, dragging the color across and around the nail, and cure. To finish, apply a thin layer of gel top coat and cure.
#2: Inspired by…
 We’ll take two pairs; you never know when you’ll need a back up. 😉
Get the Look
Step 1
 Choose your favorite mauve polish.
Apply two coats of mauve gel polish, curing after each. Do not remove the tacky layer.
Step 2
 Don’t forget your gold foil!
Apply gold foil to random areas of the nail. Then, apply a thin layer of gel top coat and cure.
Step 3
 Place gold embellishments diagonally across the nail.
Apply base gel diagonally across the middle of the nail. Using tweezers, place gold embellishments in a line in the base gel and cure. To finish, apply a layer of matte top coat,carefully avoiding the embellishments, and cure.
#3: Inspired by…
 This beautiful pale pink nail was inspired by rough snake skin textures and prints.
Get the Look
Step 1
 Apply your favorite nude gel polish.
Apply two coats of nude gel polish, curing after each.
Step 2
 Top it with a light coat of brown gel polish.
Apply a thin coat of light brown gel polish and cure.
Step 3
 Start creating your snake skin print with dark brown gel polish.
Using a striping brush, paint a single dark brown “X” at the tip of the nail, then another of the same size directly above it. Do not cure.
Step 4
 Create your snake skin pattern with small beads of gel top coat.
Using a gel brush, drop small beads of gel top coat, one at a time, starting at the center of the nail and working outward. When you are satisfied with the snakeskin pattern, cure. To finish, apply a second layer of gel top coat and cure.
Which snake skin look will you be recreating?
Nail Art: Armando Sanchez; Photos: Getty Images.


