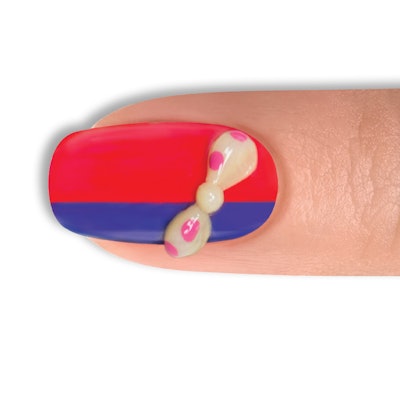
Follow these steps for a 3-D bow nail using long-lasting Gelish gel polish!
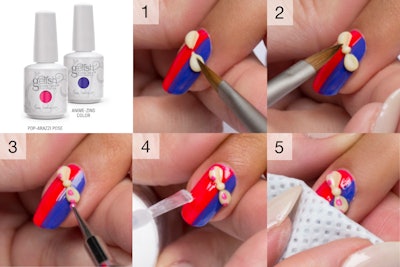
Step 1: Before beginning make sure to complete the proper nail preparation. Using a Maestro Brush and Hephaetus from the Olympus Colored Powder Kit, place a bead shaped like a water droplet onto the nail at a diagonal angle. Press into the top of the shape to show the fold of the bow. Repeat on the opposite, leaving a small space between the two folds.
Step 2: With your brush place a small dot of Hephaestus in between the 2 folds of the bow shape.
Step 3: With a dotting tool and Pop-Arazzi Pose place dots onto the folds of the bow. Cure for 30 seconds in the 18G LED Light.
Step 4: Apply a thin coat of Top It Off sealer gel, making sure to cap the free edge and cure for 30 seconds in the 18G LED Light.
Step 5: Remove the inhibition layer with Nail Surface Cleanse and a Wipe It Off lint free wipe. Massage Nourish Cuticle Oil into the skin surrounding the nail plate.
[Images: Gelish]


