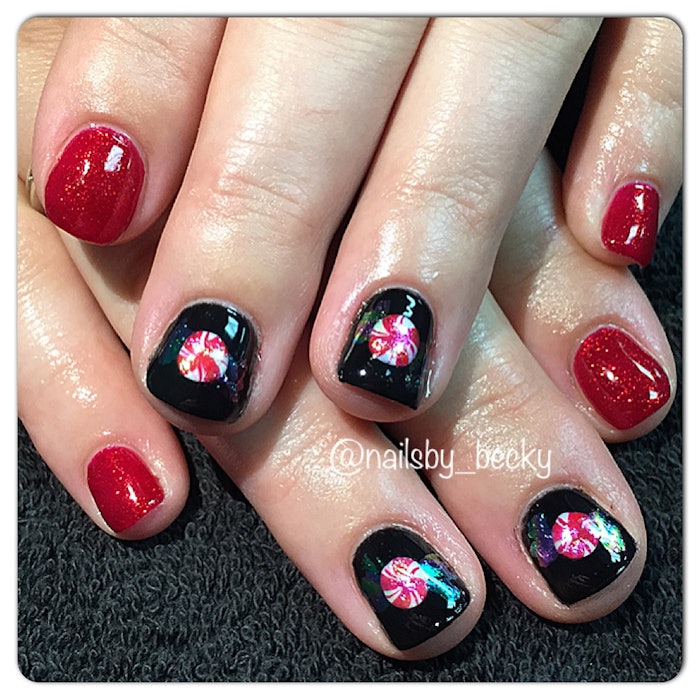

Don’t just do red and white peppermint stripes this holiday season. Put yourself ahead of the competition by creating realistic plastic wrappers with transfer foil inspired by Robin Moses! Here’s how Becky (@nailsby_becky) did the look.
Items used:
- Gelish top and base coat
- Gelish Sheek White
- Gelish Good Gossip
- Gelish Hot Rod Red
- IBD Black Onyx
- Dotting Tool
- Liner brush
- Opal Swirl foil from dollarnailart.com
- Foil glue from dollarnailart.com
Step 1: Prep nails as usual. Apply base coat and two coats of Black Onyx on ring finger and middle finger. Apply two coats of Good Gossip on remaining fingers.


Step 3: Using a liner brush and Hot Rod Red, create curved lines starting from the middle of the nail, going out to the edges.

Step 4: Using liner brush and Hot Rod Red, make small lines following the curved lines.


Find Becky’s work online:
Instagram: @nailsby_becky
Twitter: @BLCarter28
[Images: Becky Carter]


