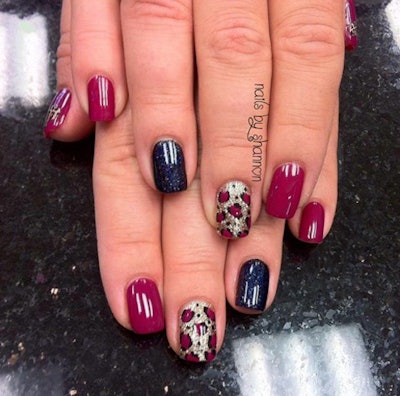
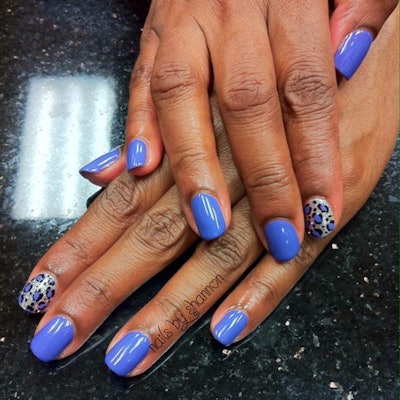
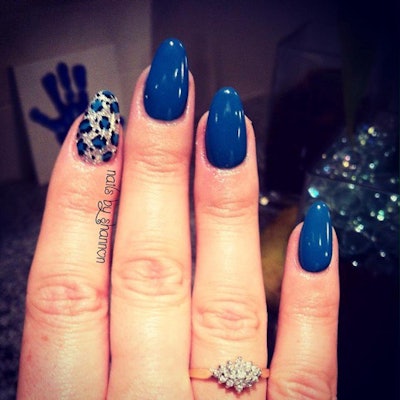
Everyone’s gotta have a little leopard print in their life! Give your clients something fierce for their nails: these printed tips and a dash of glitter.
Using the Gelish system, Shannon Underwood of Port Coquitlam (Vancouver), BC showed us step-by-step how she painted these nails. She’s even shared how the style looks on a few different clients (spoiler: it always looks fantastic!). Read on to see each step in her tutorial.
Here are the products you’ll need. For the how to, click to the next page.
Supplies Needed:
- Gelish He Loves Me, He Loves Me Not
- Gelish Night Shimmer
- Gelish Top It Off
- Gelish Top It Off (separate one for glitter)
- Gelish Foundation
- Martha Stewart Sterling Silver glitter
- Gelish #6 gel brush
- Nail Harmony Cleanse
- Nail Harmony PH Bond
- Nail Harmony Nourish
- Craft store acrylic paint
- Various dotting tools
- Gelish 18G
- Fluffy brush for glitter
- Piece of foil or thumb palette (to have somewhere to place colors needed for leopard design)
- Cuticle Pusher
- Curette (to remove all non-living tissue from sidewalls/nail plate)
- If starting this design on natural nails, prep as usual by removing all cuticle from nail plate.
- Cleanse nails well with Nail Harmony Cleanse.
- Apply PH Bond right before Gelish Foundation.
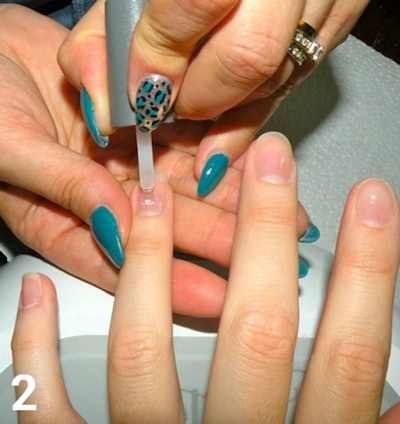
- Apply a very thin layer of Gelish Foundation in a scrubbing motion.
- Once you’ve got a very thin layer scrubbed into the nail plate and you’ve capped the free edge, smooth it out.
- Cure in your Gelish 18g for 5 seconds.
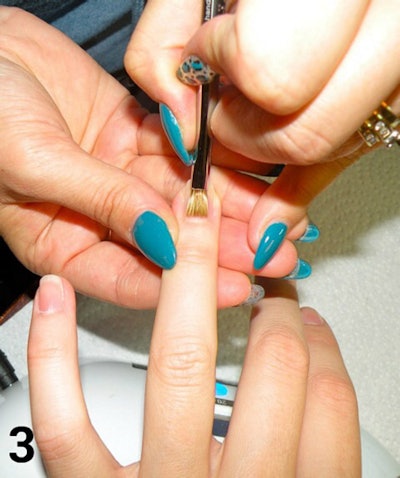
- Dry wipe your Foundation layer with a dry nail brush.
- Note: Shannon uses the Nail Harmony Gel Brush size #6. Doing this ensures a sticky surface which helps you get beautiful smooth coverage and prevents the polish from shrinking or sliding into the eponychium and side walls.
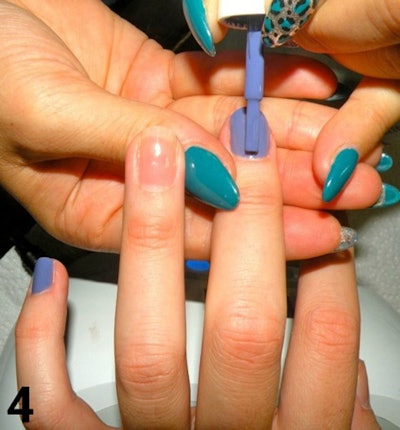
- Apply one color to all of your nails except ring fingers. Shannon chose Gelish He Loves Me, He Loves Me Not. Ensure that your first coat of polish is very thin and that you cap the free edge. Do not cure yet.
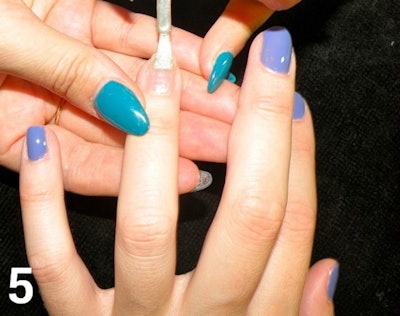
- Apply a color to match glitter of choice on ring fingers. Shannon used Gelish Night Shimmer which is a light silver shimmer that pairs well with Martha Stewart Sterling Silver Glitter. Apply a thin layer; cap the free edge.
- Cure in Gelish 18g for 30 seconds.
- Apply a second coat of He Loves Me He Loves Me Not and cure in Gelish 18g for 30 seconds. Do not add a second coat of Night Shimmer to ring fingers.
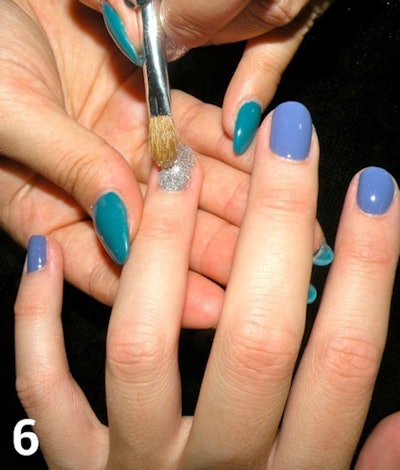
- Take a fluffy brush, dip into your glitter, then pat lightly onto your nail.
- After you have patted enough glitter onto the nail, lightly press it down and brush away any glitter that has gotten into the sidewalls or near the eponychium.
- Note: To ensure a very sparkly/glittery look, do not burnish the glitter into the nail too vigorously. Burnishing with your brush will create more of a foiled look versus a glittery look.
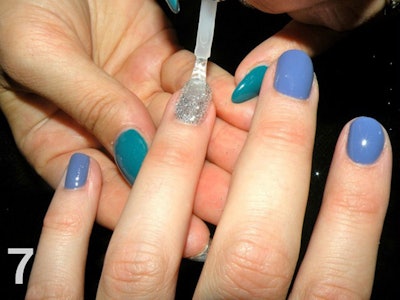
- Seal the glitter using Top It Off (preferably one you have exclusively for glitter work). Ensure you seal all edges and the free edge.
- Cure Top It Off in Gelish 18g for 30 seconds.
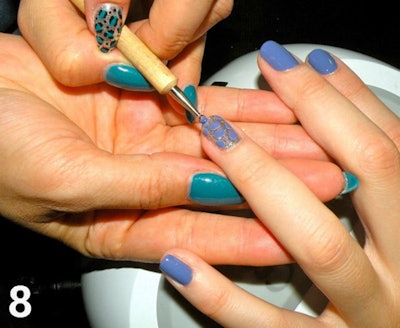
- Wipe inhibition layer from Top It Off and with a medium sized dotting tool, apply dots in random shapes and sizes to the nail. Be sure to leave enough space to add detail to the leopard print afterwards. These need to be opaque but thin enough to ensure proper cure.
- Cure in Gelish 18g for 30 seconds.
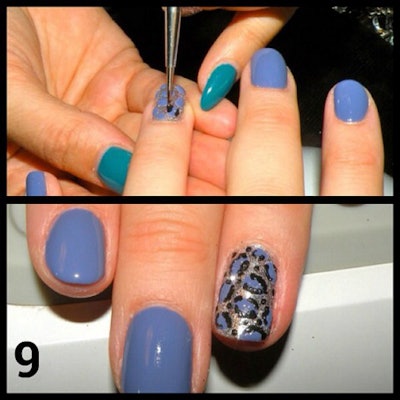
- Using black acrylic paint and a small-pointed dotting tool, outline the dots you have made. The key is to not use the same outline for each. As you can see in the photo, the black outline is all a little bit different. This is how you achieve the leopard appearance as true leopard spots are not all the same.
- Add small dot accent in between the leopard print.
- Let the acrylic paint dry. You will know it is dry when the glossiness disappears.
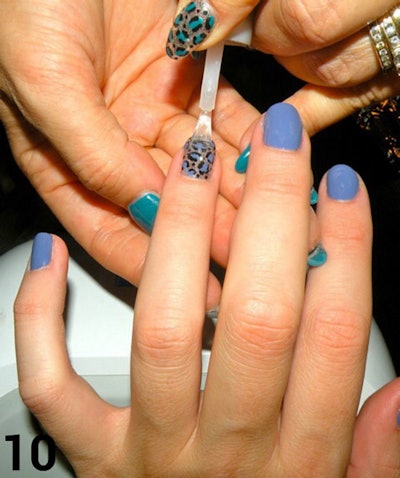
- Apply Top It Off in a very thin layer to all nails. Make sure that when you apply Top It Off to the designed nails, you take extra care to cap the free edge and cover the entire design well.
- Cure in Gelish 18g for 30 seconds.
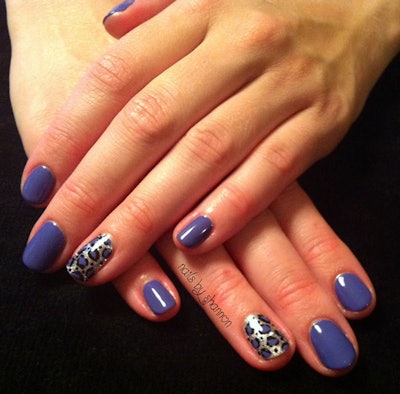
- Remove inhibition layer from all nails with Gelish Cleanse or 99% Isopropyl Alcohol.
- Apply Nail Harmony Nourish to all nails and enjoy your fabulous design!

Like Shannon’s work?
Find Shannon on Facebook: facebook.com/shannonunderwoodnails
Or Instagram @shannonunderwoodnails
[Images: Shannon Underwood]


