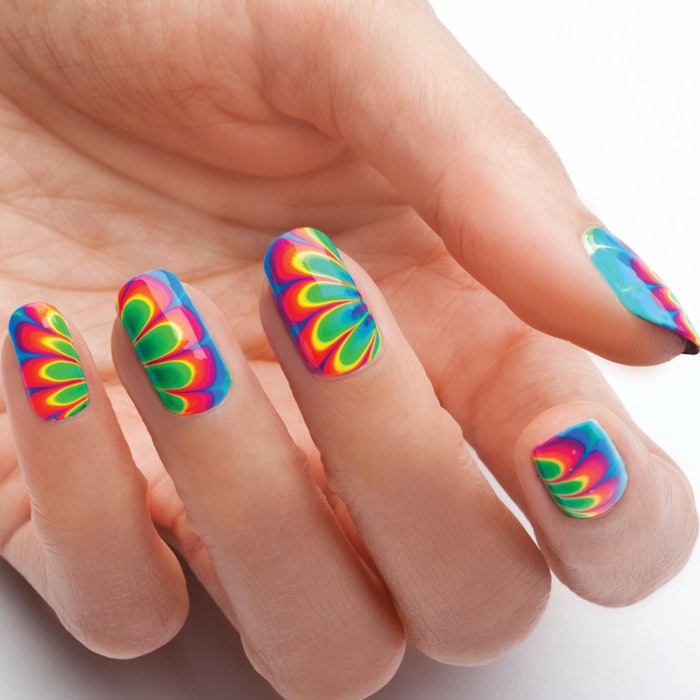

Blow clients out of the water by mastering the technique that will give you a perfect rainbow flower print every time! Water marbling expert @sloteazzy shows how:
1. Fill a small disposable cup with room-temperature filtered water. Apply one coat of white polish. Tape around your cuticles to make cleanup easier.
2. Drop a bead of lacquer into the water. Swirl a Q-tip in the water around the polish to help it spread to the sides of the cup. If it isn’t spreading, try a thinner polish.
3. Continue dropping other polish colors into the center of the cup, allowing each color to spread and separate. A good water marble needs around 15 drops, so repeat the color pattern until you reach that number.
4. Take a needle and lower it into the design, five rings in from the outermost color. Slowly drag the needle inward until you reach the center of the bull’s-eye.
5. Continue this process, first with 4 lines, then 8, then 16.
6. Hold your nail facedown and parallel to the water. Quickly lower your nail at a 45-degree angle into the water and hold it there momentarily. Use a Q-tip to pick up all of the excess polish around your finger. Remove your finger from the water. Remove the tape and use an angled brush dipped in acetone to wipe away any unwanted polish left around the cuticle. Allow the design to dry and apply top coat.

Tips for a Perfect Water Marble
• Make sure to turn off any fans, air conditioners or heaters before starting. Air can dry out the polish too quickly and affect the way it spreads.
• Use a small disposable cup (rather than a large drinking cup) to hold the water. The 3-oz.-size clear cup you use for condiments at a restaurant is perfect.
• Filtered, room-temperature water works best. Bottled spring water may seem like a good idea, but often doesn’t work.
• Choose thin, newer polishes. If you’re having trouble getting the polish to spread in the water, snag some nail polish thinner from a beauty supply store. Note: Acetone does not count as nail polish thinner!
• Using polishes from the same brand tends to work best.
• Gently pull the water around the edge of the polish with a Q-tip to encourage the lacquer to spread to the sides of the cup.
• Use a needle (instead of a toothpick) to create the designs.
• Clean off the needle on a paper towel each time you draw a line in the polish.
• Never drag the polish from the outermost circle, as it will have already dried by the time you get to this step. Always start from the third or fourth ring from the outside.
[Images: Armando Sanchez]


